Fix 1: Reset and Change the Power Plan
If your computer is randomly going to sleep, there may be something wrong with the power plan settings. Windows lets you decide the time after which your computer will go to sleep automatically. If it is set to a small number, say 1 minute, your computer will automatically go to sleep after being inactive for that time.
To tackle this situation, ensure the Sleep after setting is set to a higher number, like 10 minutes. Here’s how to change this setting.
Step 1: Press Win + X and click on Terminal (Admin).
Step 2: Type the following command in Terminal and press Enter to reset Power Configuration to default settings.
powercfg -restoredefaultschemes
Step 3: Press the Windows + I keys shortcut to open the Settings app.
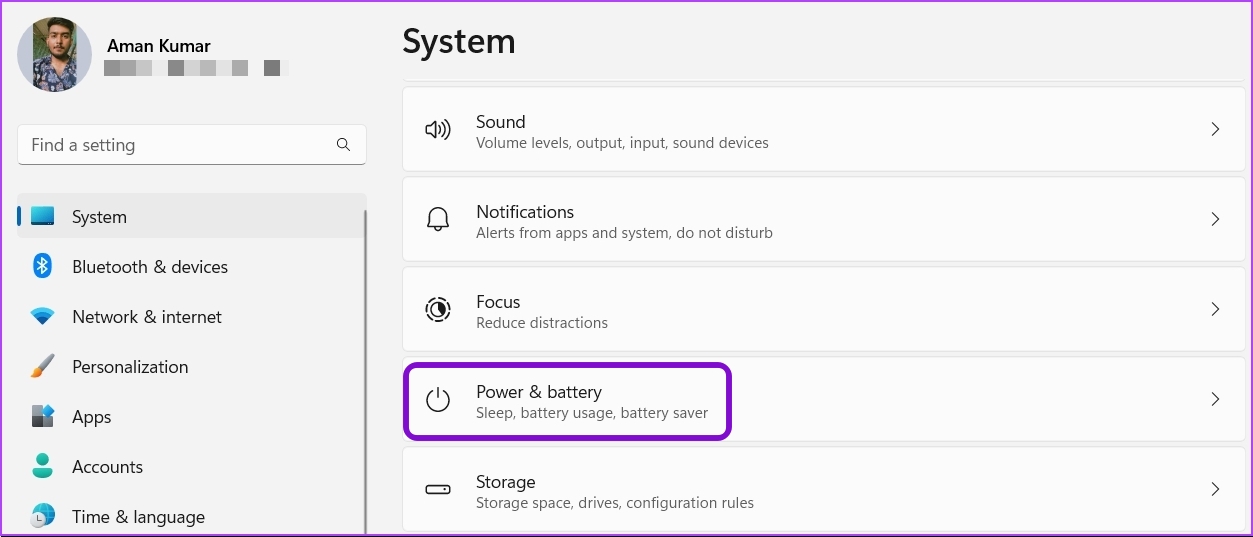
Step 4: Choose System from the left sidebar and select Power & battery in the right pane.
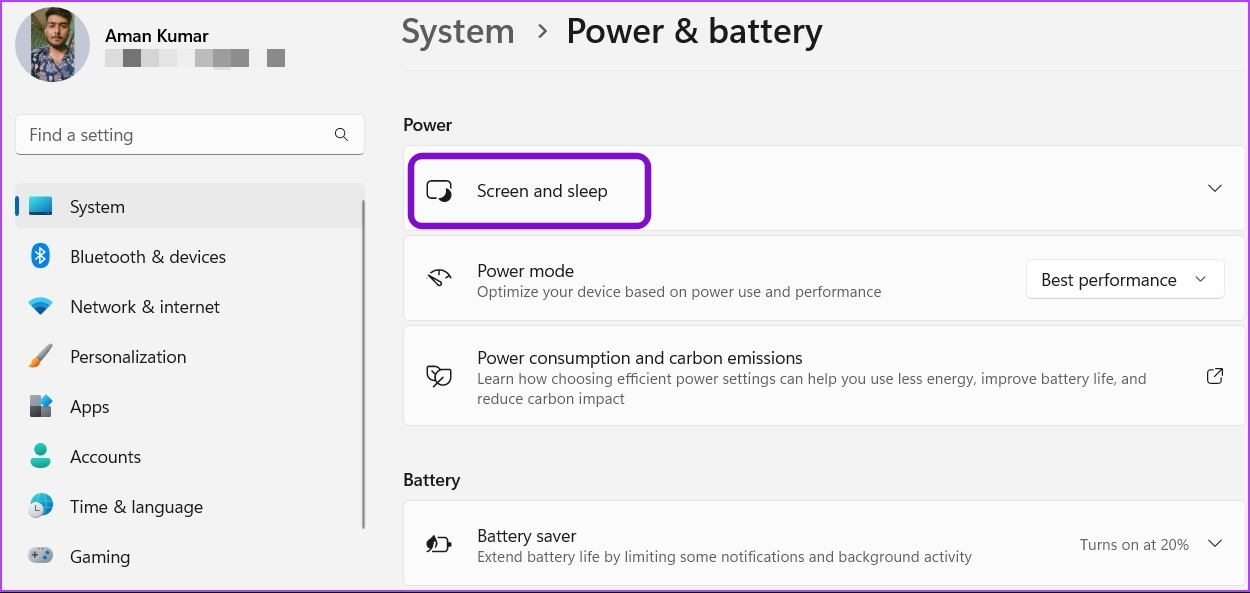
Step 5: Click the drop-down icon next to Screen and sleep.
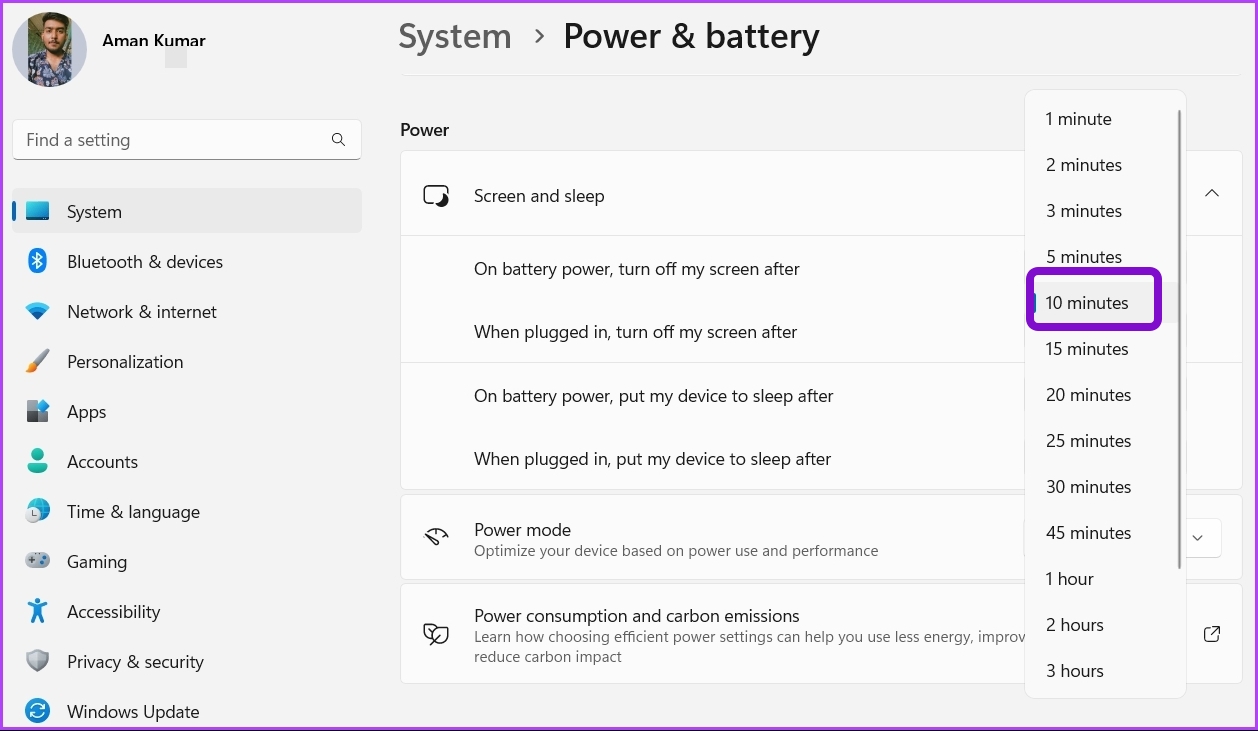
Step 6: Now, click the drop-down icon next to On battery power, put my device to sleep after, and select a number. We recommend choosing 10 minutes.
Step 7: Repeat the same for When plugged in, put my device to sleep after, but choose 15 minutes.
Fix 2: Uninstall Recently Installed Windows Update
Microsoft regularly releases Windows updates to introduce new features and fix bugs and glitches. A computer randomly going to sleep issue can result from a system bug. If the issue surfaced because of a recent Windows update, you can choose to uninstall it.
Step 1: Go to Windows Settings (Win + I) > Windows Update.
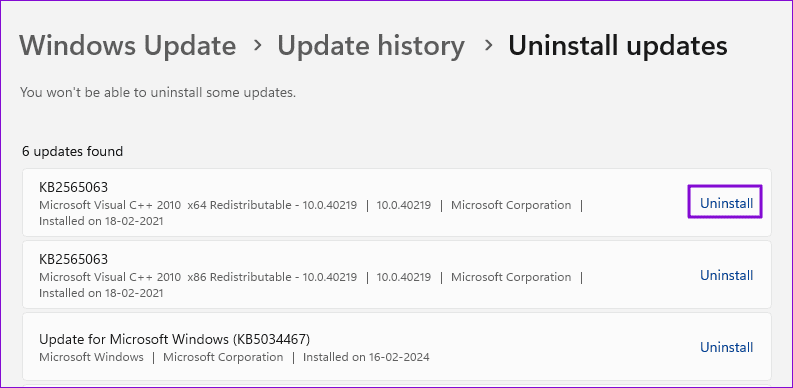
Step 2: Click on Update History and scroll to find Uninstall updates. Click to open it.
Step 3: Click the Uninstall link next to the recent Windows Update.
Fix 3: Update the Graphics Driver
Like Windows updates, check if the recent driver update started causing the issue; if not, you can use the OEM software to update the driver. If a recent update causes the problem, it’s best to roll back the driver. You can use the Display Driver Uninstaller to remove the existing driver and reinstall it using OEM software.

Along similar lines, we suggest updating BIOS or UEFI, which could fix power issues on your laptop. Sometimes, the UEFI bug causes the system to enter a sleep state prematurely under certain conditions, and updating can fix the issue. That said, follow the instructions carefully.
Fix 4: Customize the Screen Saver Settings
Windows offers various screen saver options, one of which is Blank mode. When enabled, your computer’s screen will go black and look like it is in sleep mode.
So, it could be that you misjudged the screensaver with the sleep mode. To fix that, disable the screensaver or change the Wait time.
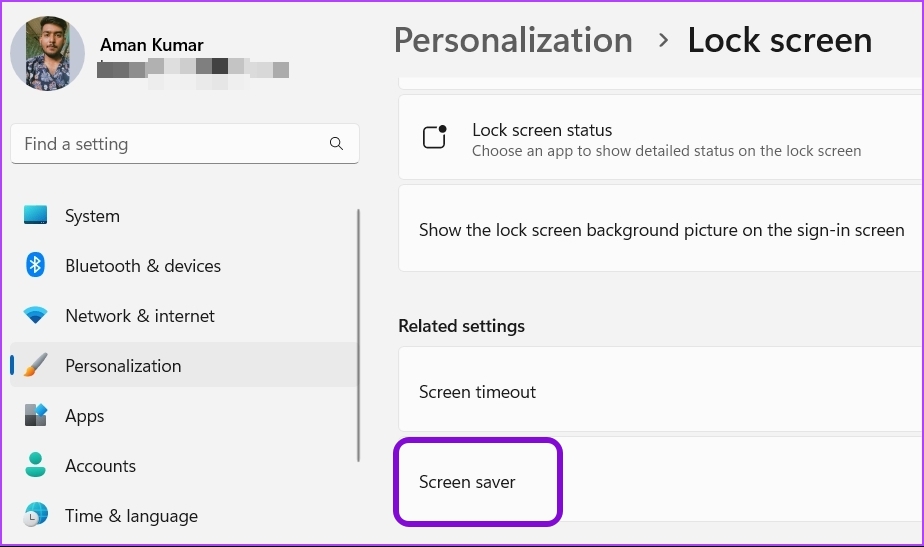
Step 1: Press the Windows + I keys shortcut to open the Settings app and choose Personalization from the left sidebar.
Step 2: Select the Lock screen from the right pane and choose Screen Saver under the Related settings section.
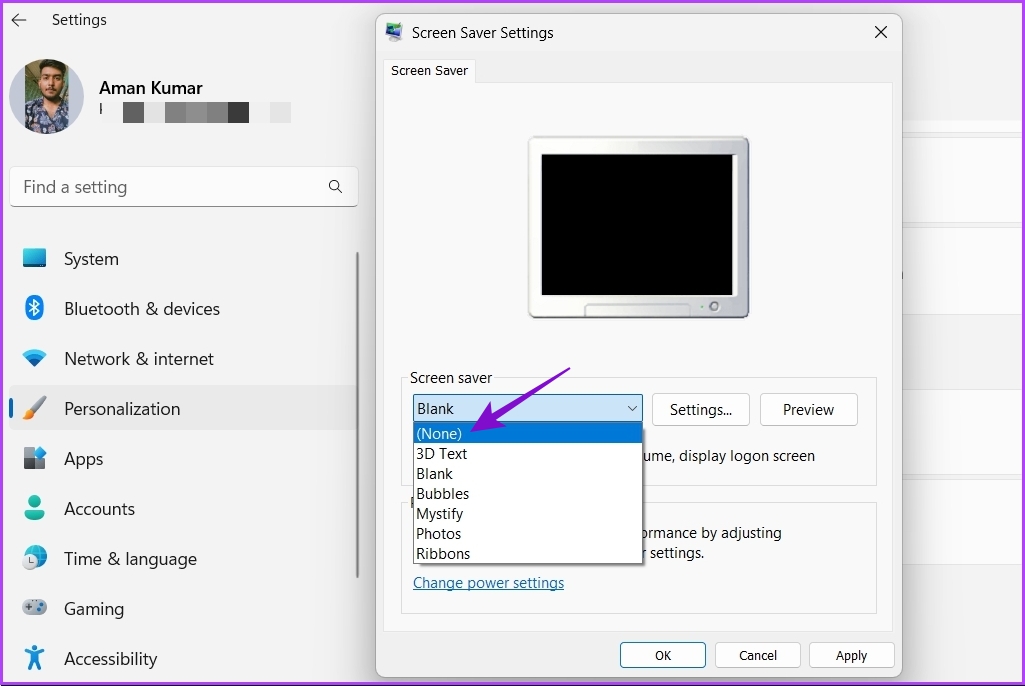
Step 3: In the Screen Saver Settings window, click the drop-down under Screen saver and choose None to remove the screen saver.
Tip: You can also change the timer next to Wait to a higher number if you want to keep the screen saver but don’t want it to become active so quickly.
Step 4: After making the changes, click Apply and OK to save the settings.
Fix 5: Keep the Computer Away From Strong Magnetic Devices
The issue of Windows going to sleep randomly is common on laptops. This can also happen when magnets in nearby devices like smartwatches and smartphones trigger your laptop’s sleep mode. We know that sounds outlandish but a user figured it out and posted it on Microsoft Community Forum.
As it turns out, magnets are on your laptop’s screen and keyboard part. When you close the lid, the magnetic sensors of your laptop detect the interaction between these magnets and put the laptop to sleep.
Now, if you bring a magnetic device near the correct spot of your laptop, the operating system thinks that the laptop is closed due to the interaction between two magnets. As a result, the OS puts your laptop into sleep mode.
To tackle this situation, the best thing is to remove any electronic device containing magnets from your laptop. Alternatively, you can customize the Choose what closing the lid does setting in Control Panel.
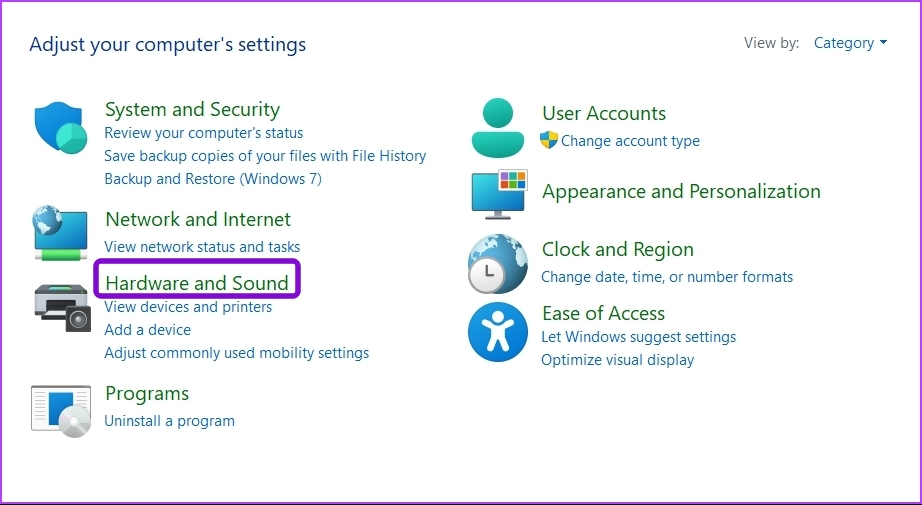
Step 1: Open the Start menu, type Control Panel in the search bar, and press Enter.
Step 2: Choose Hardware and Sound.
Step 3: Select Power Options.
Step 4: Click on Choose what closing the lid does option in the left sidebar.

Step 5: Click the drop-down icon next to When I close the lid option and choose Do nothing. Select the same option for Plugged in as well.
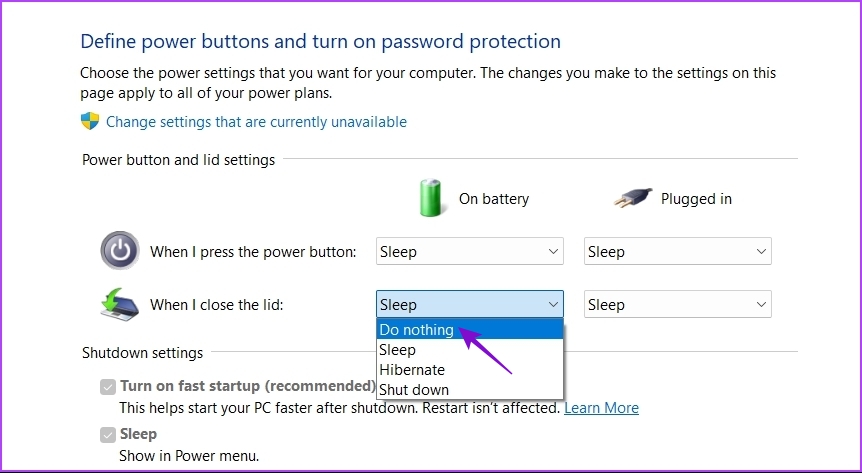
Step 6: Click the Save changes button.
Was this helpful?
Last updated on 20 April, 2024
Read Next
 Top 9 Ways to Fix Windows PC Randomly Waking Up From Sleep
Most PC users keep their desktops in sleep mode to be ready to use within a few seconds.
Top 9 Ways to Fix Windows PC Randomly Waking Up From Sleep
Most PC users keep their desktops in sleep mode to be ready to use within a few seconds.
 Top 6 Fixes for Samsung Galaxy Watch Keeps Vibrating Randomly
Typically, your Samsung Galaxy smartwatch should vibrate when you receive a notification.
Top 6 Fixes for Samsung Galaxy Watch Keeps Vibrating Randomly
Typically, your Samsung Galaxy smartwatch should vibrate when you receive a notification.
 8 Best Ways to Fix Mouse Sensitivity Changes Randomly on Windows 10
While mice and keyboards help while working with desktop or laptop, the mouse gets finicky sometimes.
8 Best Ways to Fix Mouse Sensitivity Changes Randomly on Windows 10
While mice and keyboards help while working with desktop or laptop, the mouse gets finicky sometimes.
 Top 10 Ways to Fix Monitor Goes Black Randomly on Windows
Thanks to neat multitasking add-ons, Windows 11 is a joy on an external monitor.
Top 10 Ways to Fix Monitor Goes Black Randomly on Windows
Thanks to neat multitasking add-ons, Windows 11 is a joy on an external monitor.
 Top 10 Ways to Fix Windows 11 Keeps Rebooting Randomly
You are up for a broken workflow when your Windows 11 PC restarts randomly.
Top 10 Ways to Fix Windows 11 Keeps Rebooting Randomly
You are up for a broken workflow when your Windows 11 PC restarts randomly.
 9 Best Ways to Fix Google Home Randomly Beeps Issue
The smartness of a Google Home speaker can become spooky if it activates automatically.
9 Best Ways to Fix Google Home Randomly Beeps Issue
The smartness of a Google Home speaker can become spooky if it activates automatically.
 How to Stop the Mail App From Opening Randomly on Mac
Are you facing issues with the Mail app opening randomly on your Mac?
How to Stop the Mail App From Opening Randomly on Mac
Are you facing issues with the Mail app opening randomly on your Mac?
 Top 8 Ways to Fix Android Vibrates Randomly for No Reason
Your Android phone usually vibrates to alert you about incoming calls, messages, and app notifications.
Top 8 Ways to Fix Android Vibrates Randomly for No Reason
Your Android phone usually vibrates to alert you about incoming calls, messages, and app notifications.
The article above may contain affiliate links which help support Guiding Tech. The content remains unbiased and authentic and will never affect our editorial integrity.