We take screenshots regularly, whether it’s a funny meme on Twitter or an important slide in an online meeting. A lot of times though, we may only want to capture a certain part of the screen. This is especially true if you want to share a screenshot with someone. In such cases, it’s handy to know how to crop a screenshot on your Mac.
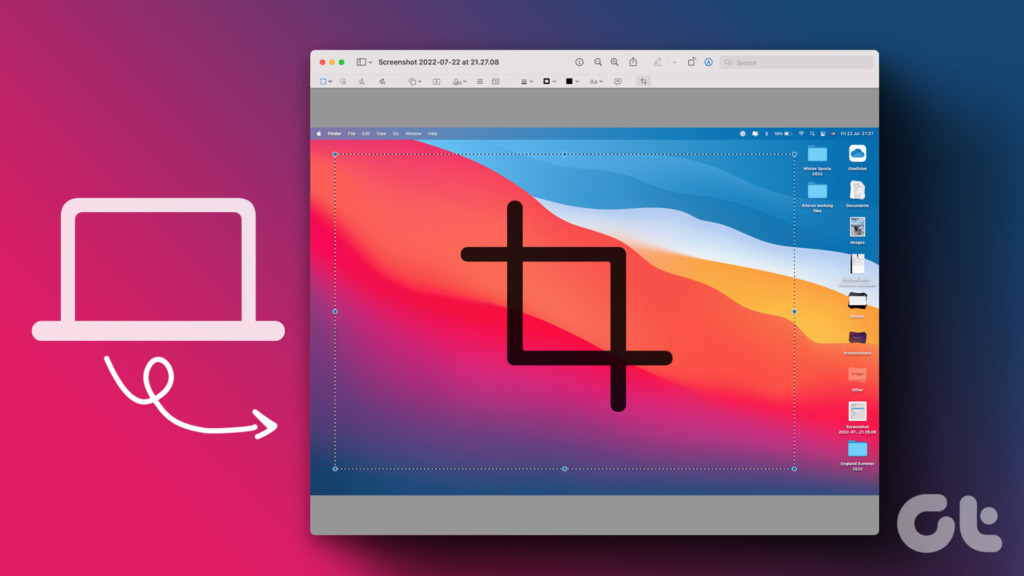
There are several ways in which you can crop screenshots on your Mac to capture only a particular portion of the screen. We’ll go over the simplest and the best methods to help you achieve this on your computer. Let’s start with the easiest one.
1. How to Take a Cropped Screenshot on Mac
There are several ways of capturing and editing a screenshot on Mac. You can capture the entire screen, a certain portion, a window, or even record your screen. Using these methods, you can directly capture a cropped screenshot.

The Mac crop screenshot shortcut for a particular section of the screen is Command + Shift + 4. Once you press those keys, you will get an option to select the portion of the screen you want to capture.
However, if you’ve already captured your entire screen and wish to crop out a certain section, there are some methods you can use. You can go through all the steps and use the method that seems the most convenient to you.
2. How to Crop an Image on Mac Using the Screenshot Tool
As soon as you capture a screenshot on your Mac, you will see a small thumbnail in the bottom-right corner of your screen. You can interact with this thumbnail to edit and crop a screenshot. This is how you can do it.
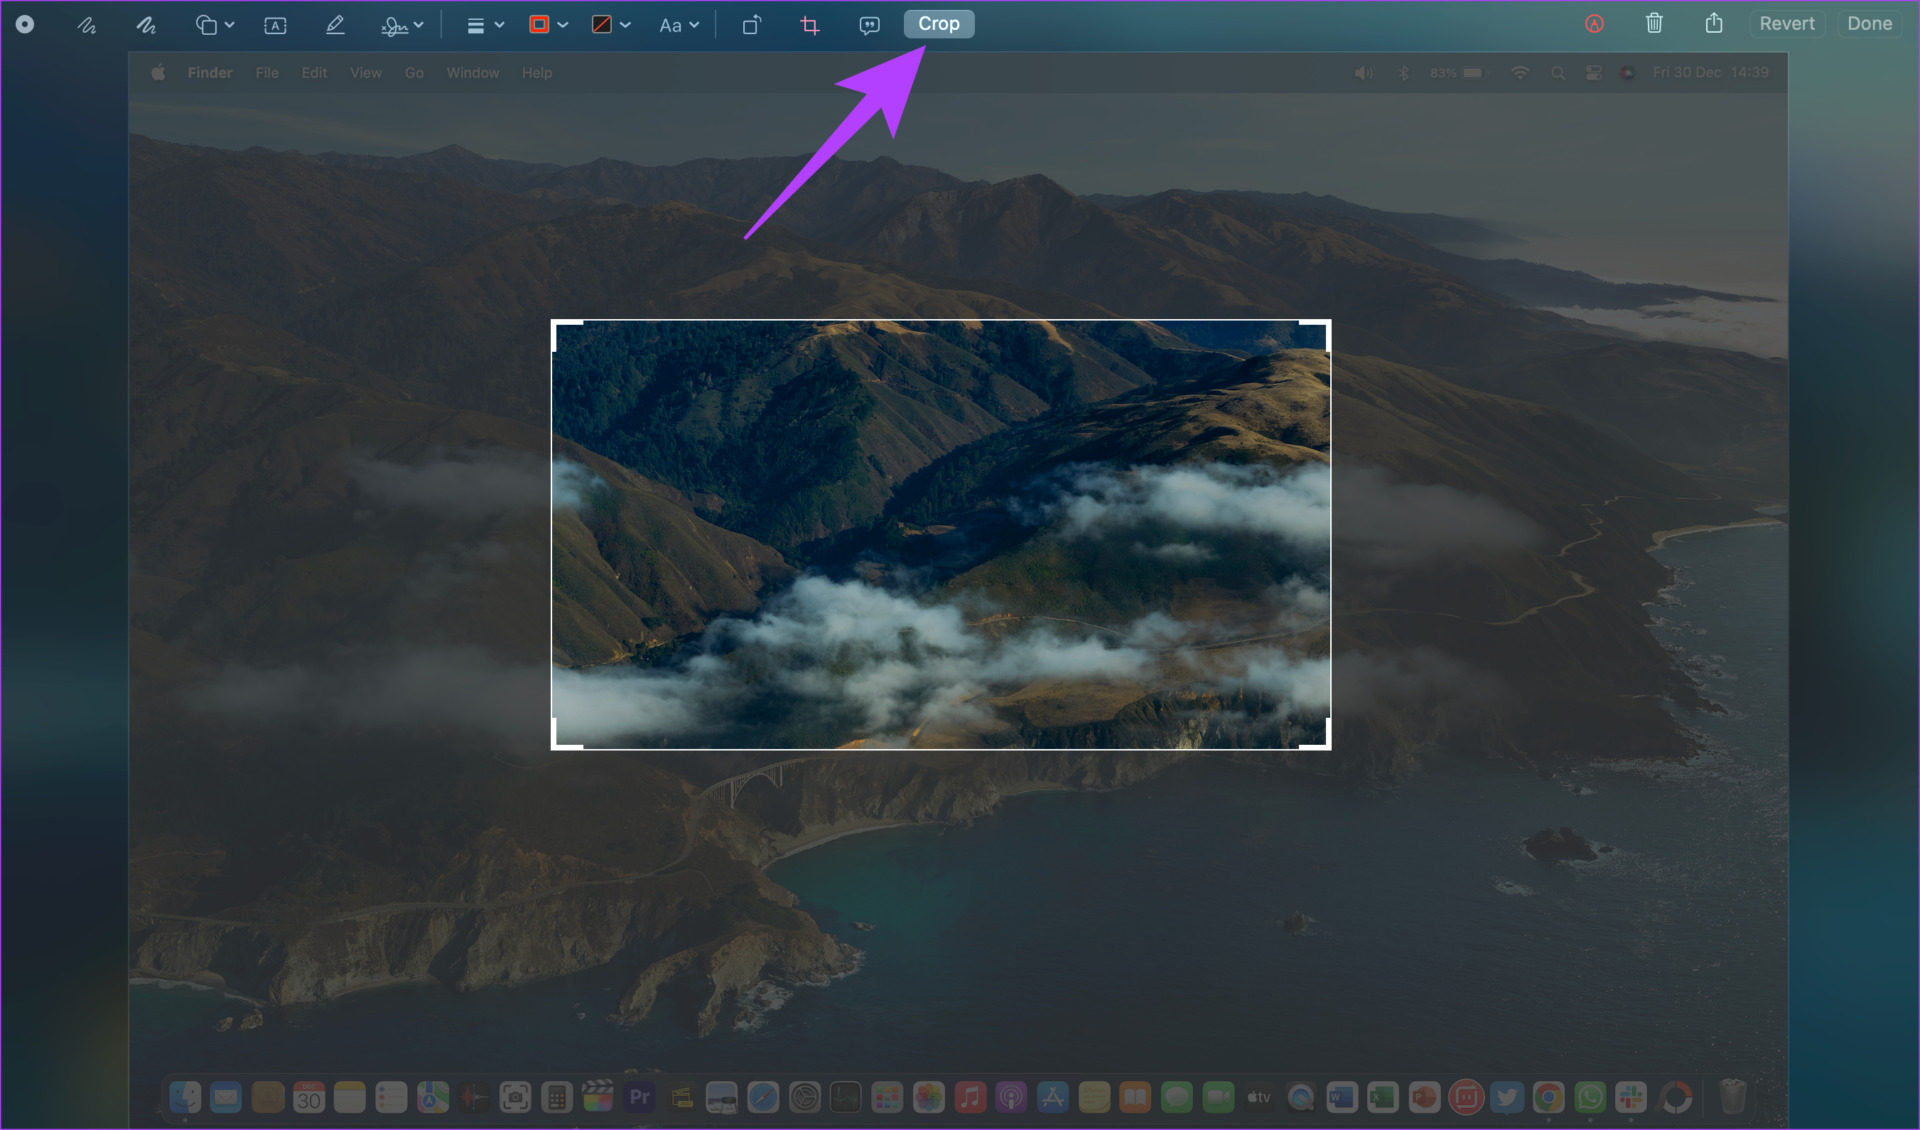
Step 1: Capture a screenshot on your Mac. Then, click on the thumbnail that appears at the bottom of the screen.

Step 2: Select the edit option in the window that pops up.

Step 3: Choose the crop button at the top.

You can now drag the 4 corners inwards or outwards to select the portion you want to capture.
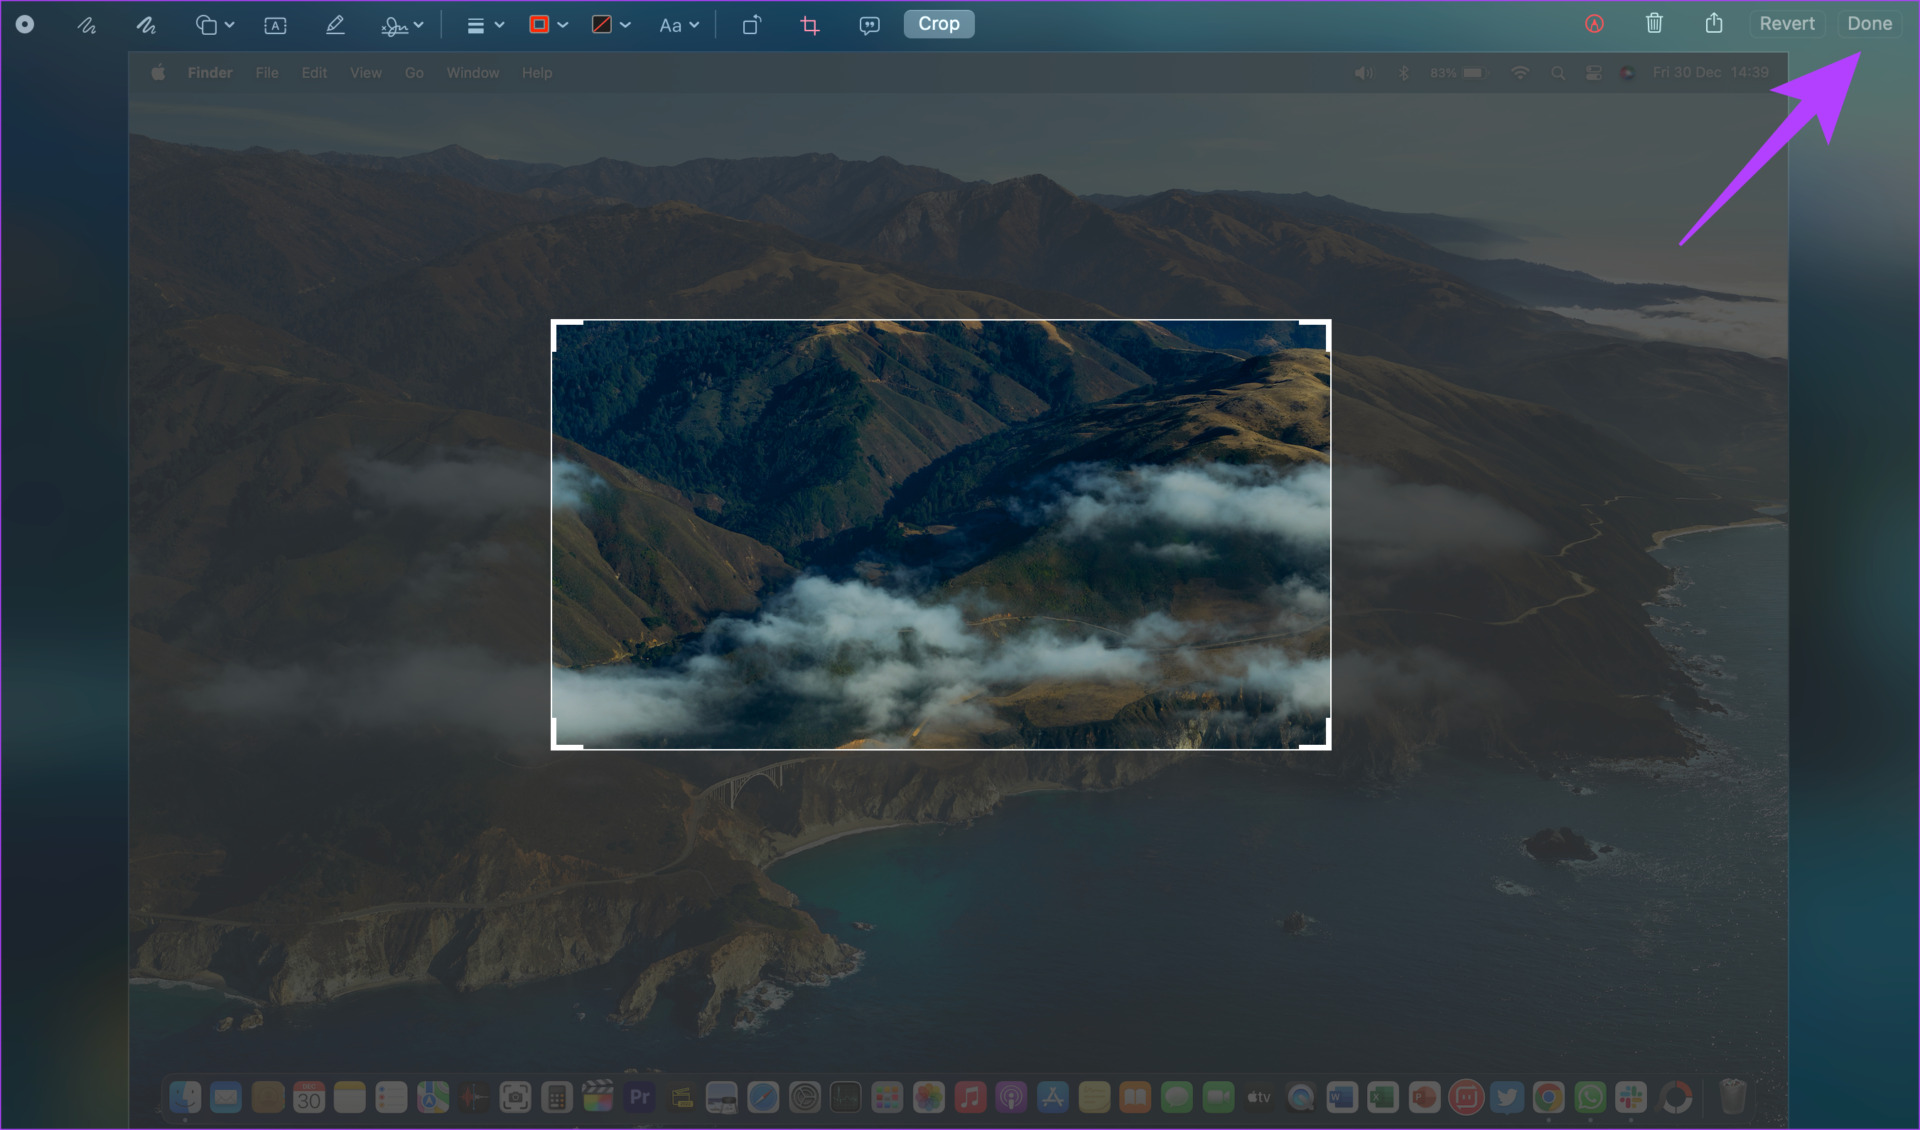
Step 4: Once you’re happy with the selected portion, hit Crop.
Step 5: Then, click on Done to save the cropped screenshot on your Mac.
However, this option to access the snipping tool is only available for a few seconds after the screenshot is taken. If you weren’t fast enough to click the screenshot thumbnail, don’t worry. You can move on to the next method.
3. Crop a Screenshot on Mac Using Preview
Preview is the default image viewer on macOS. You can use the app to edit your screenshots as well once you’ve captured them. Here’s how to crop screenshots in Preview.
Step 1: Navigate to the location where your screenshots are stored. You can use Finder for this.
Step 2: Double-click on the screenshot you want to crop. The image will now open in a new Preview window.

Step 3: Click on the show markup toolbar (pencil icon) in the top-right corner. Your mouse cursor will now change to the selection tool.
Step 4: Drag your cursor to cover the area of the screenshot that you want to crop.

Step 5: Once you’re satisfied with the selected area, press the Command + K keys on your keyboard.

The selected portion will now be cropped out. This is how to crop screenshots on Mac using the Preview app. To save the image, press Command + S.
4. How to Crop a Mac Screenshot Using the Photos App
If you’re familiar with using the Photos app on your Mac, you can use that too for cropping screenshots. Here’s how you can import a screenshot into the Photos app and use the built-in editor to crop a photo on your Mac.
Step 1: Navigate to the location where your screenshots are stored. You can use Finder for this.
Step 2: Right-click on the screenshot you want to crop.

Step 3: Hover your cursor over Open With. Then, select the Photos app. If you don’t find the app in the list, select the Other option.
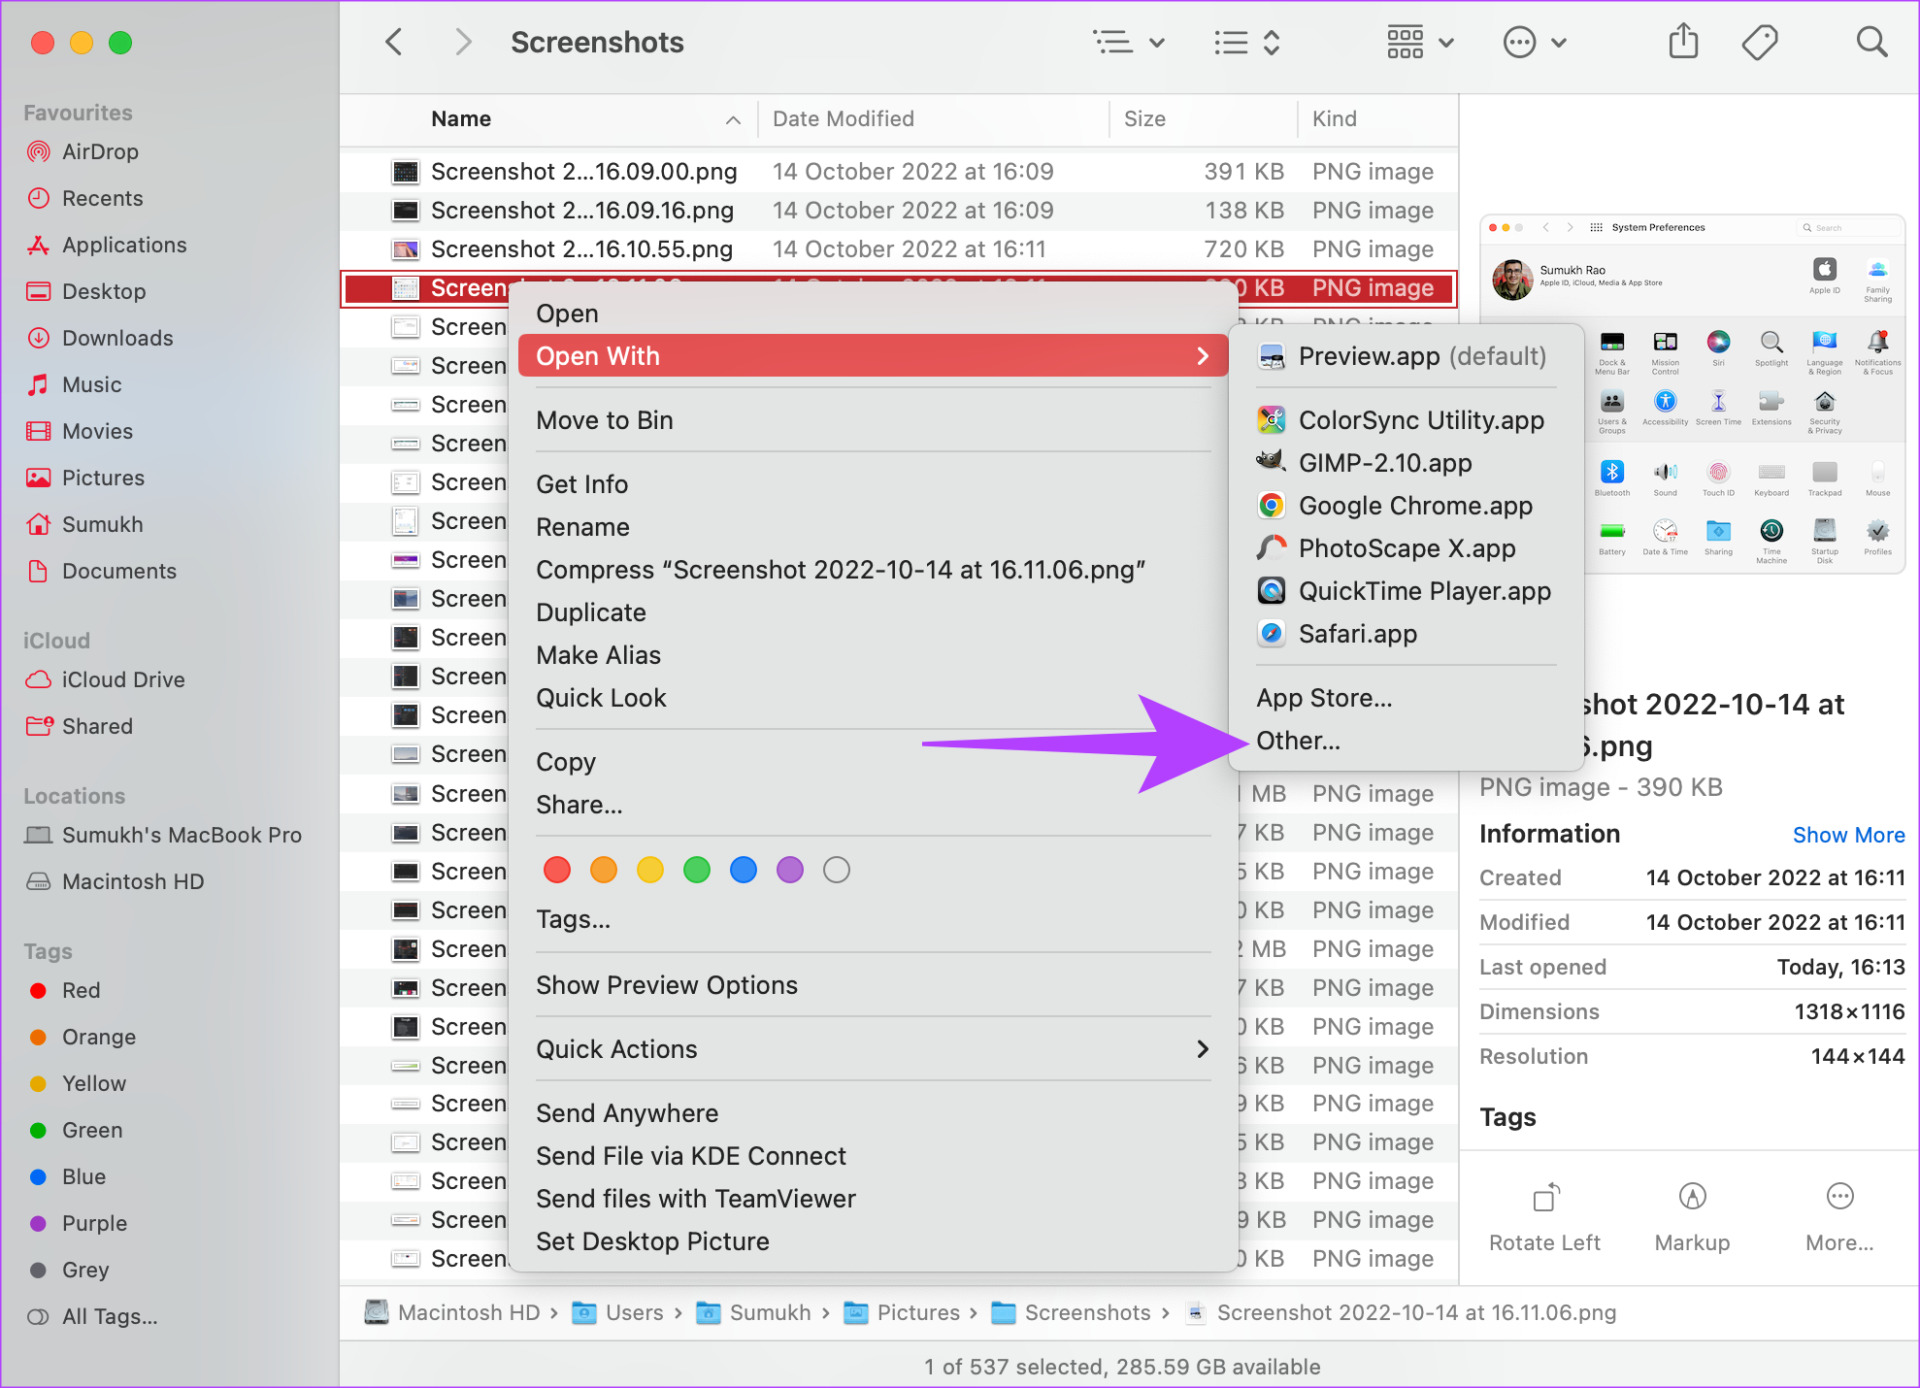
Step 4: Scroll through your list of apps in the window. Find and select the Photos app. Then, click on Open.

Your screenshot will now open directly in the Photos app.
Step 5: Click on the Edit button in the top-right corner of the screen.

Step 6: Now, navigate to the Crop section. You can find it as a tab at the top of the screen.
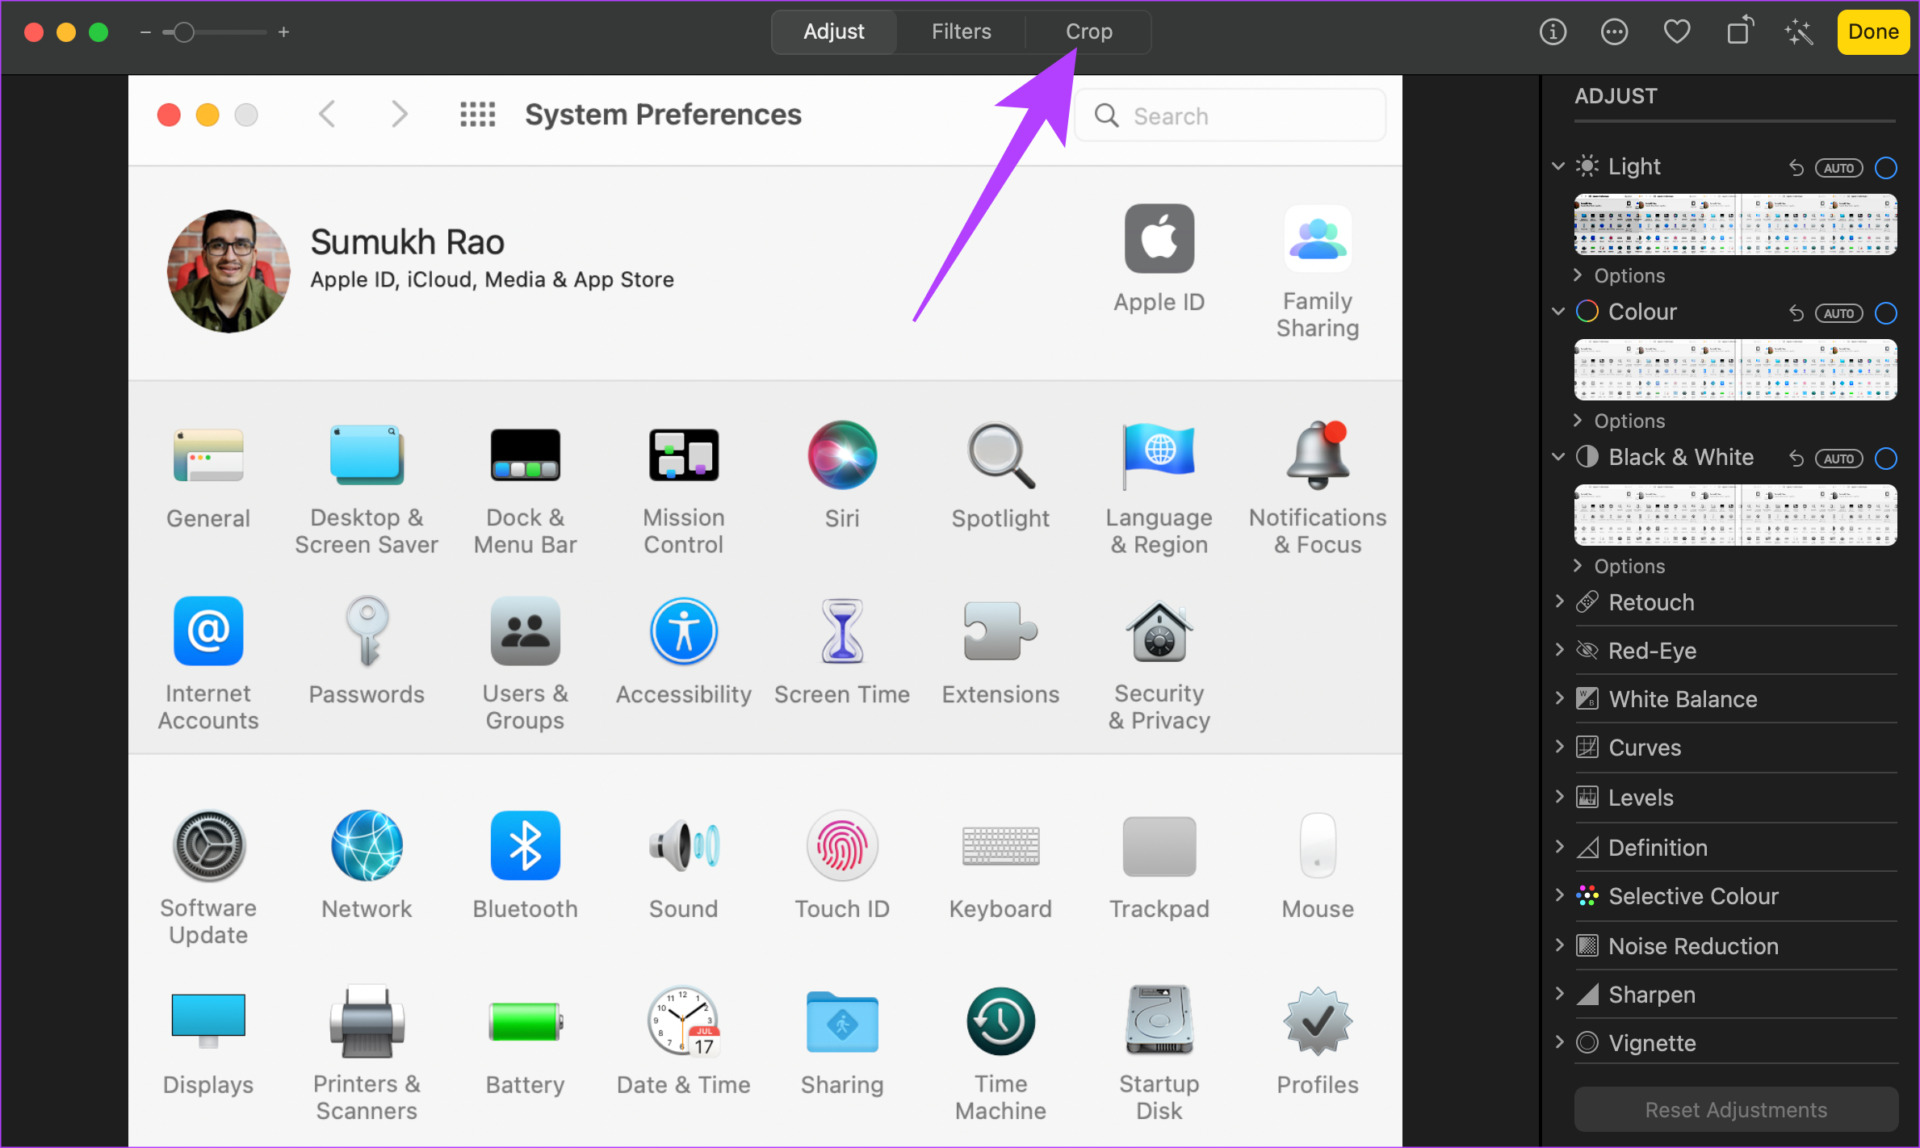
Step 7: Drag the 4 corners inwards or outwards to select the portion you want to crop. Then, tap on Done.

The screenshot will now be cropped and saved on your Mac.
5. Use Third-Party Apps to Crop Screenshots on Mac
There are a ton of third-party editing tools and apps that you can use to edit your images on a Mac. We use and recommend Photoscape X as it is free and simple to use. In fact, all the screenshots you see in this article are cropped using Photoscape X. Here’s how you can use the app to crop your screenshots.
Step 1: Download Photoscape X from the App Store on your Mac using the link below.
Step 2: Once installed, open the app on your Mac.
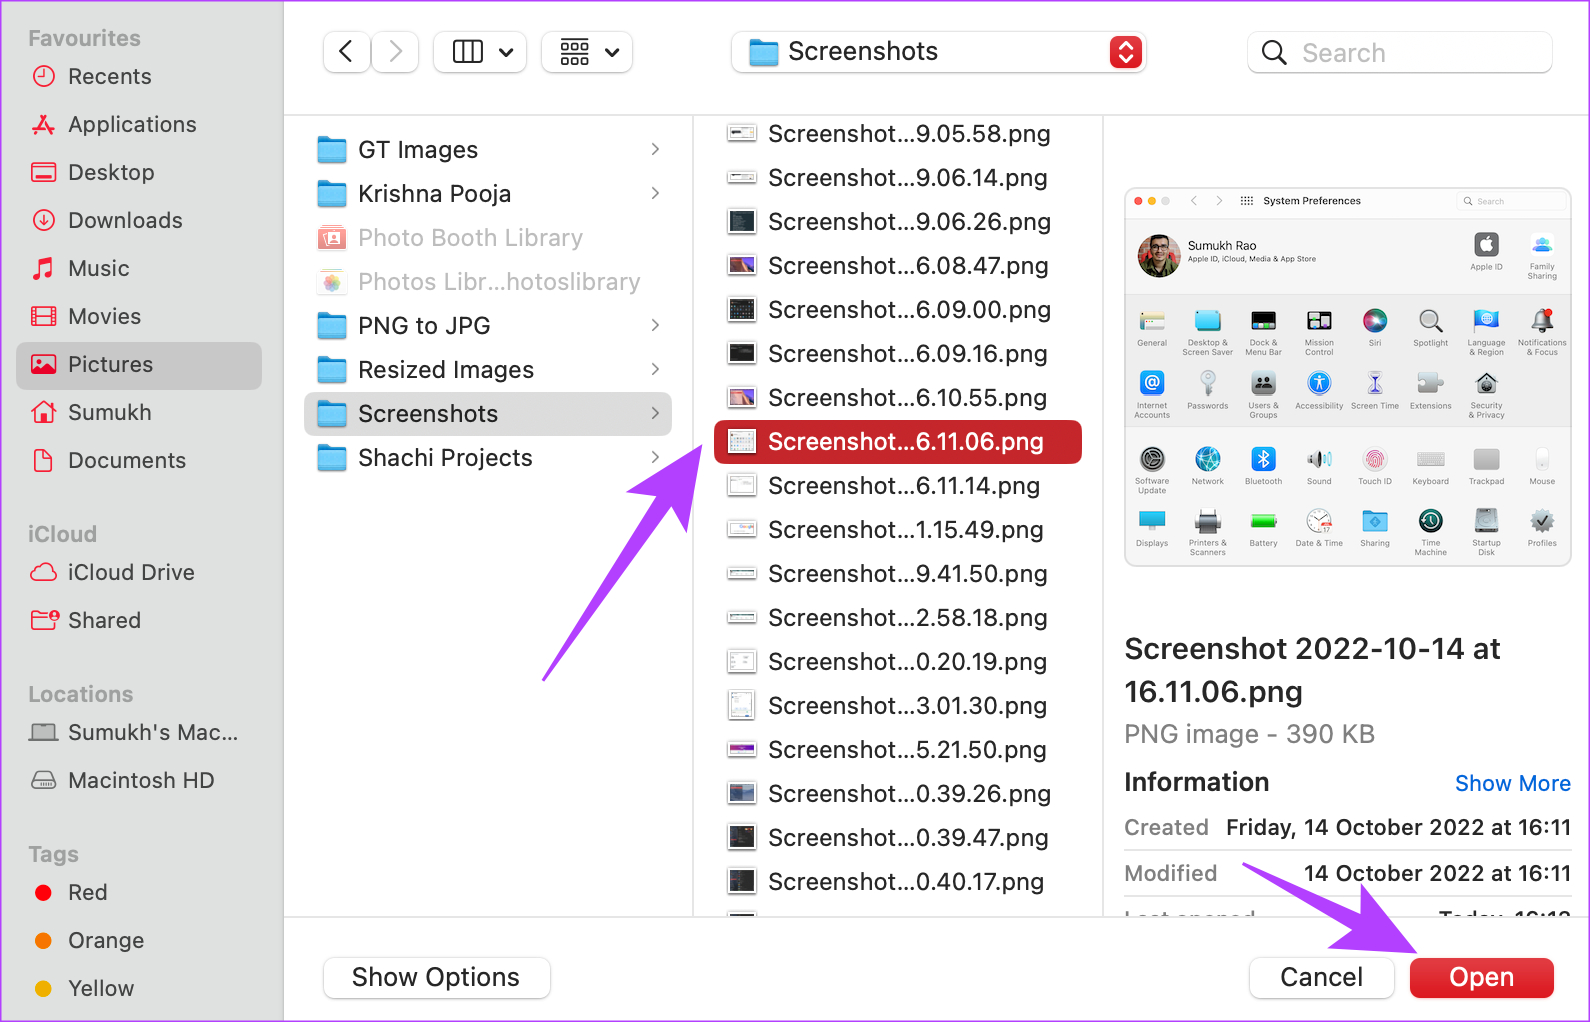
Step 3: Select the Open option at the bottom. You will now see a Finder window.
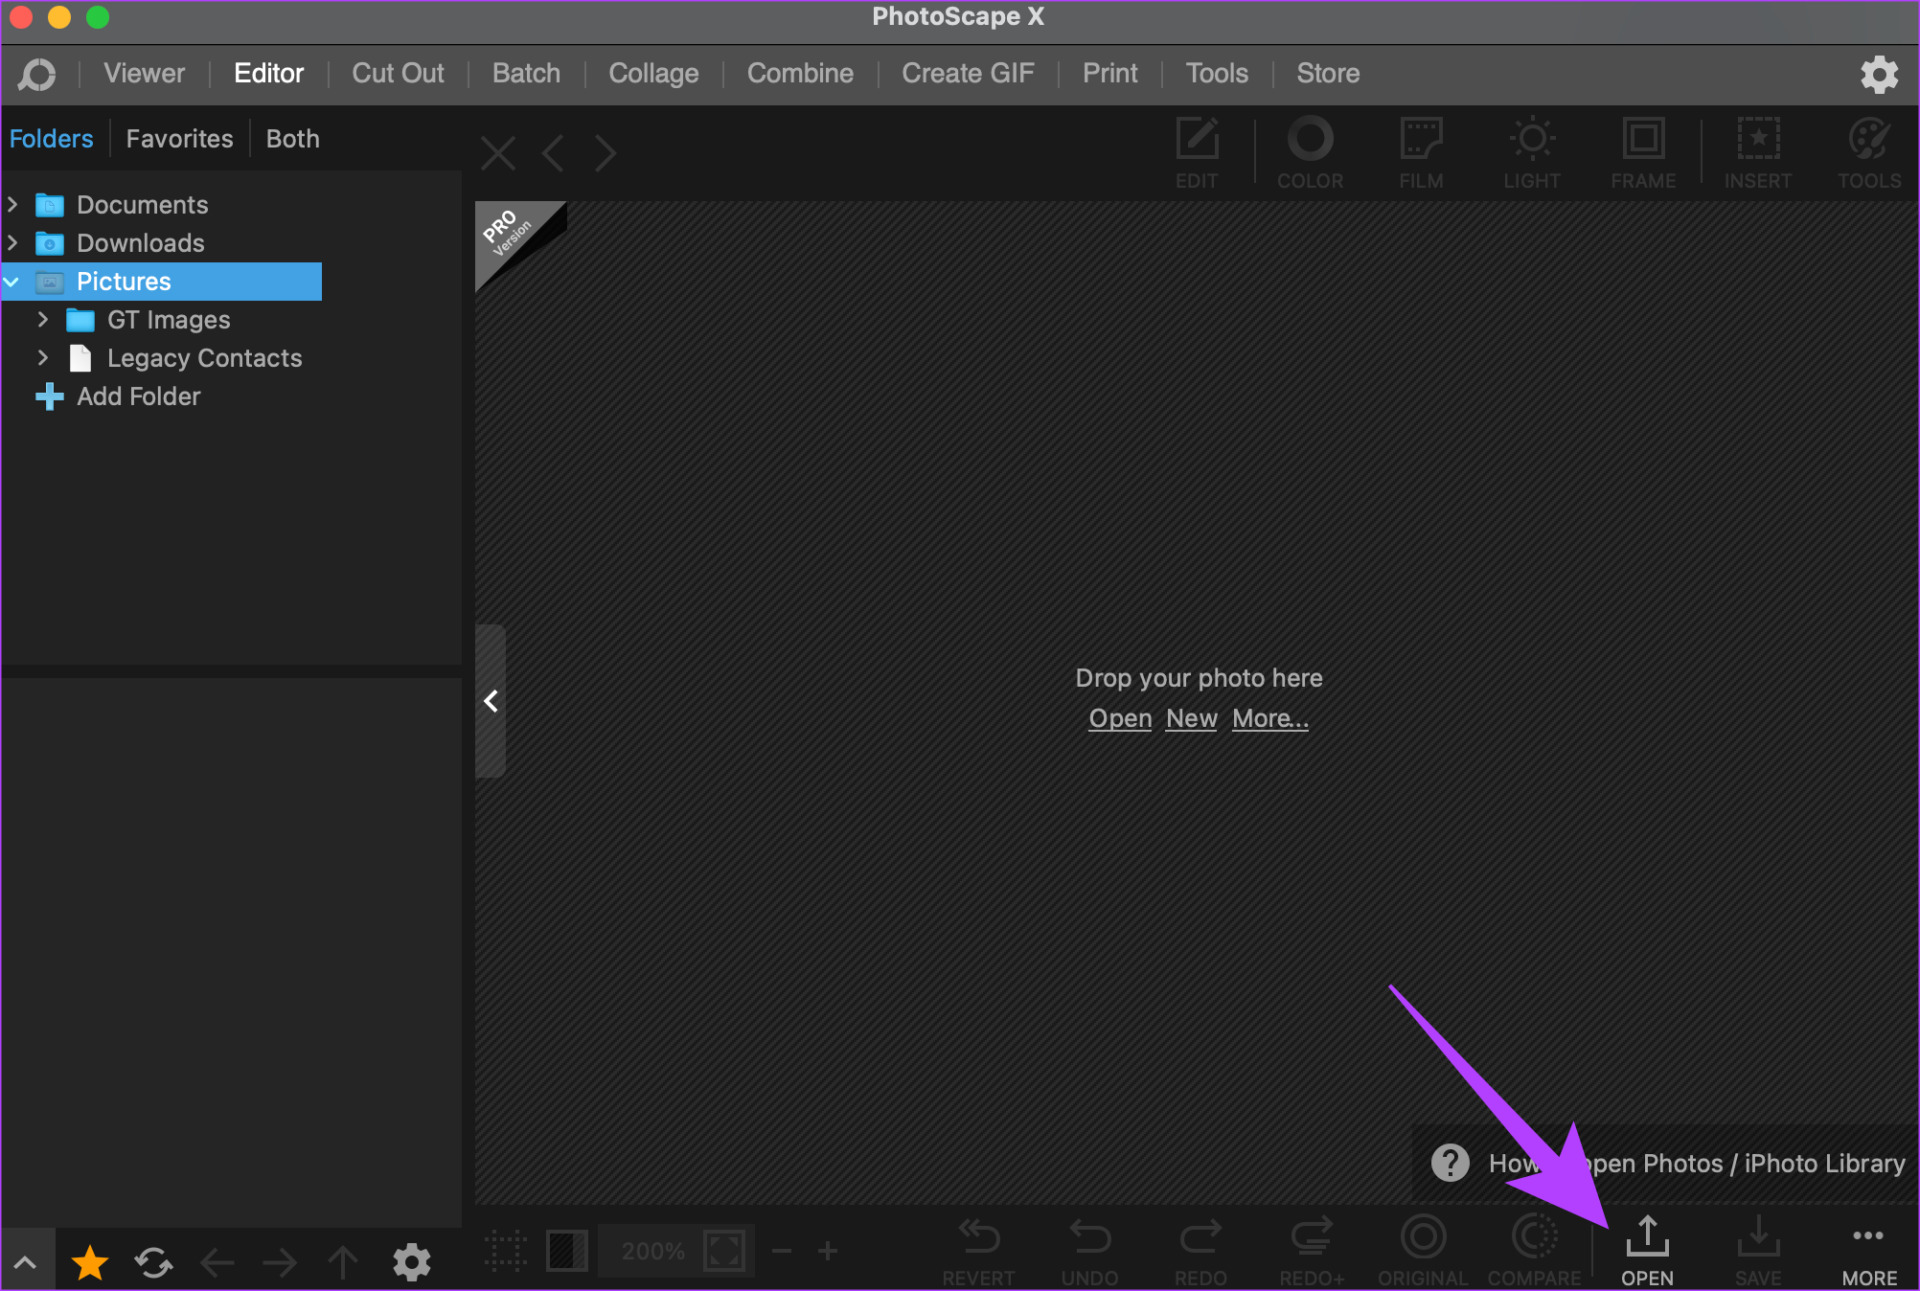
Step 4: Navigate to the screenshot you want to crop. Select it and then click on Open.

Step 5: Choose the Edit option within the app. Then, click on Crop.
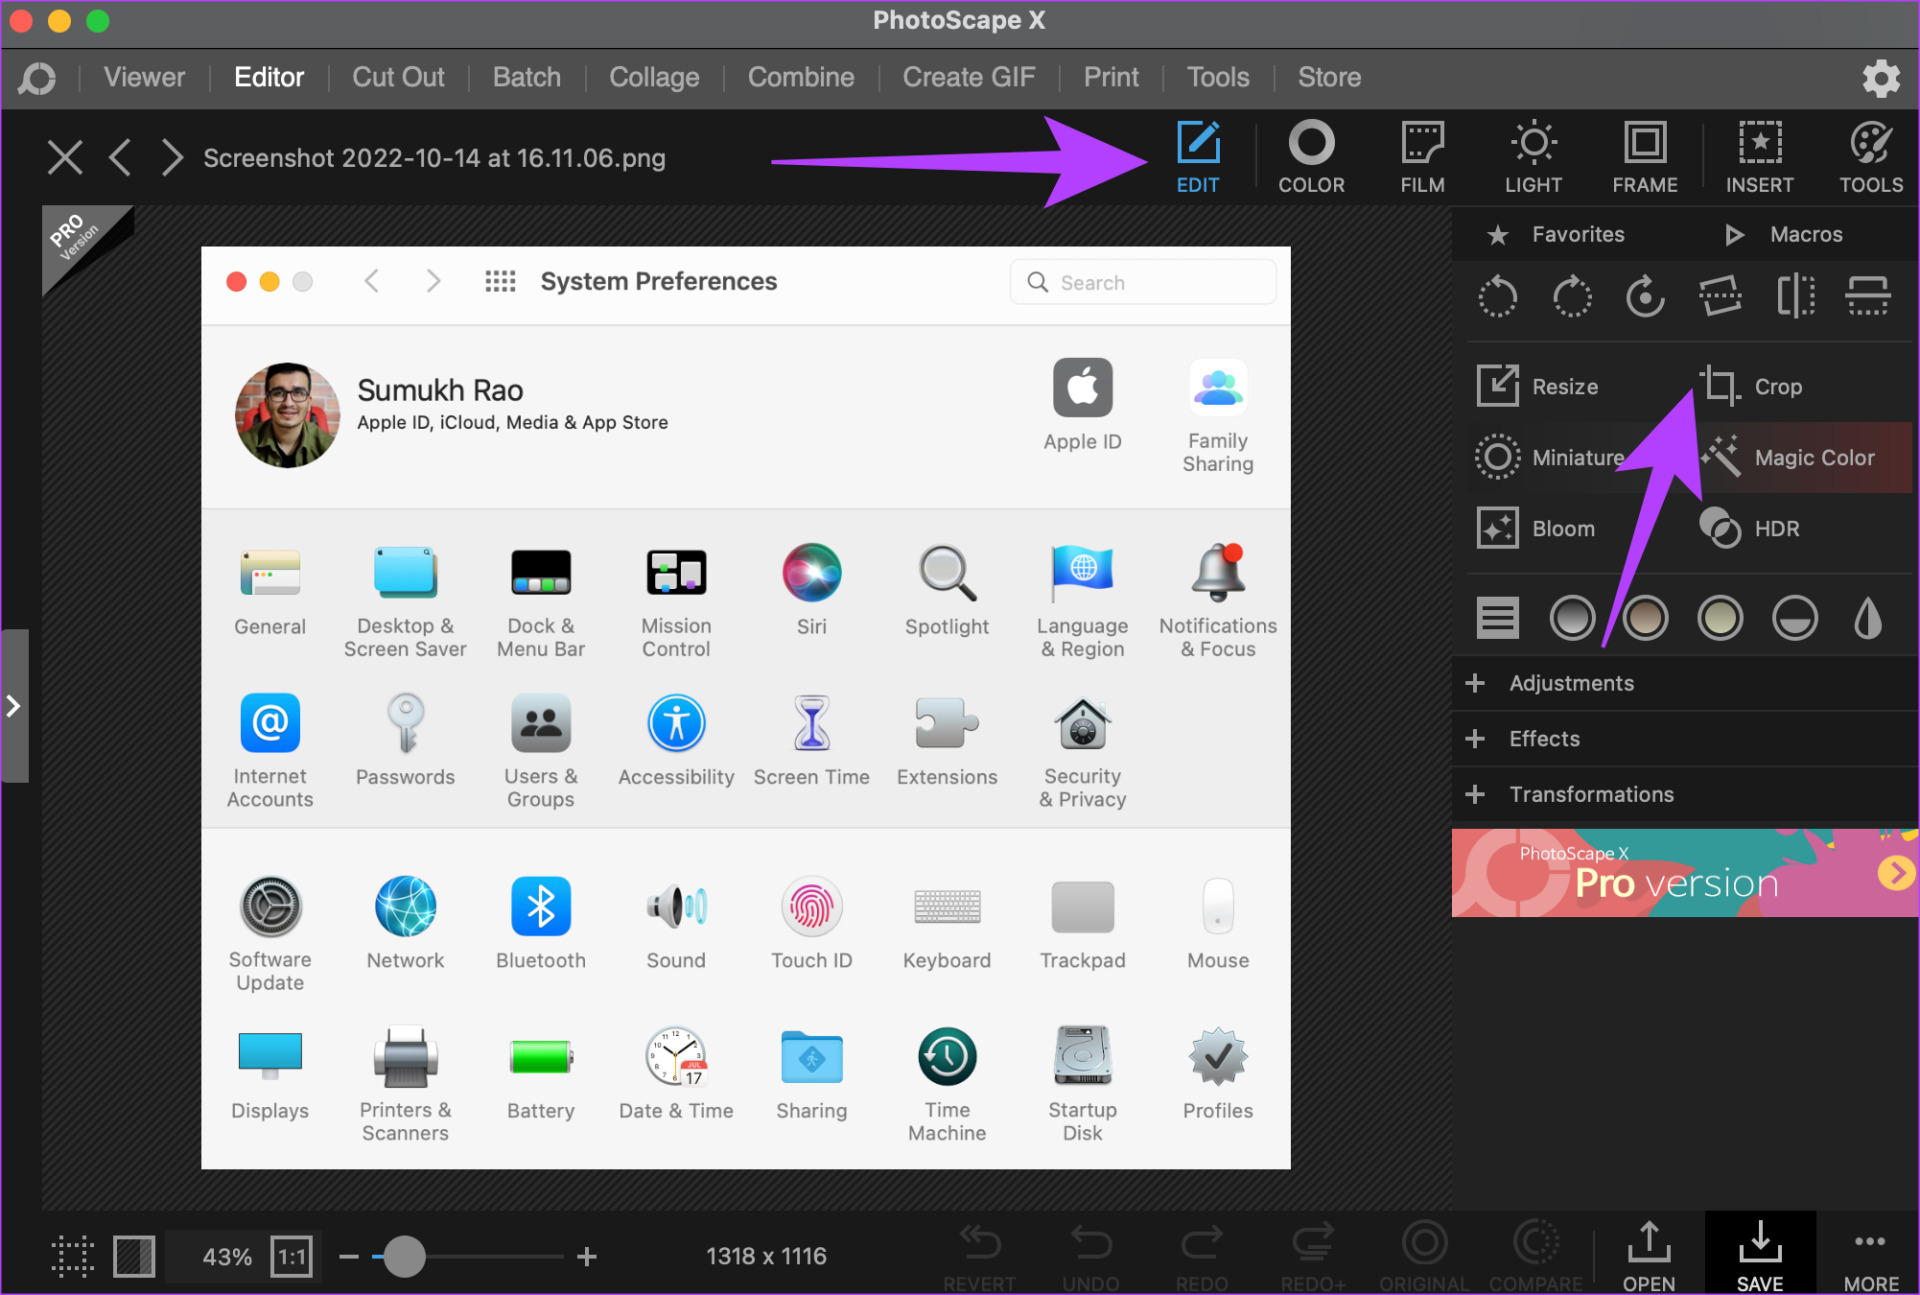
Step 6: Drag your mouse cursor to cover the area of the screenshot that you want to crop.
Step 7: Once you’re satisfied with the selected area, select Crop in the bottom-right corner.
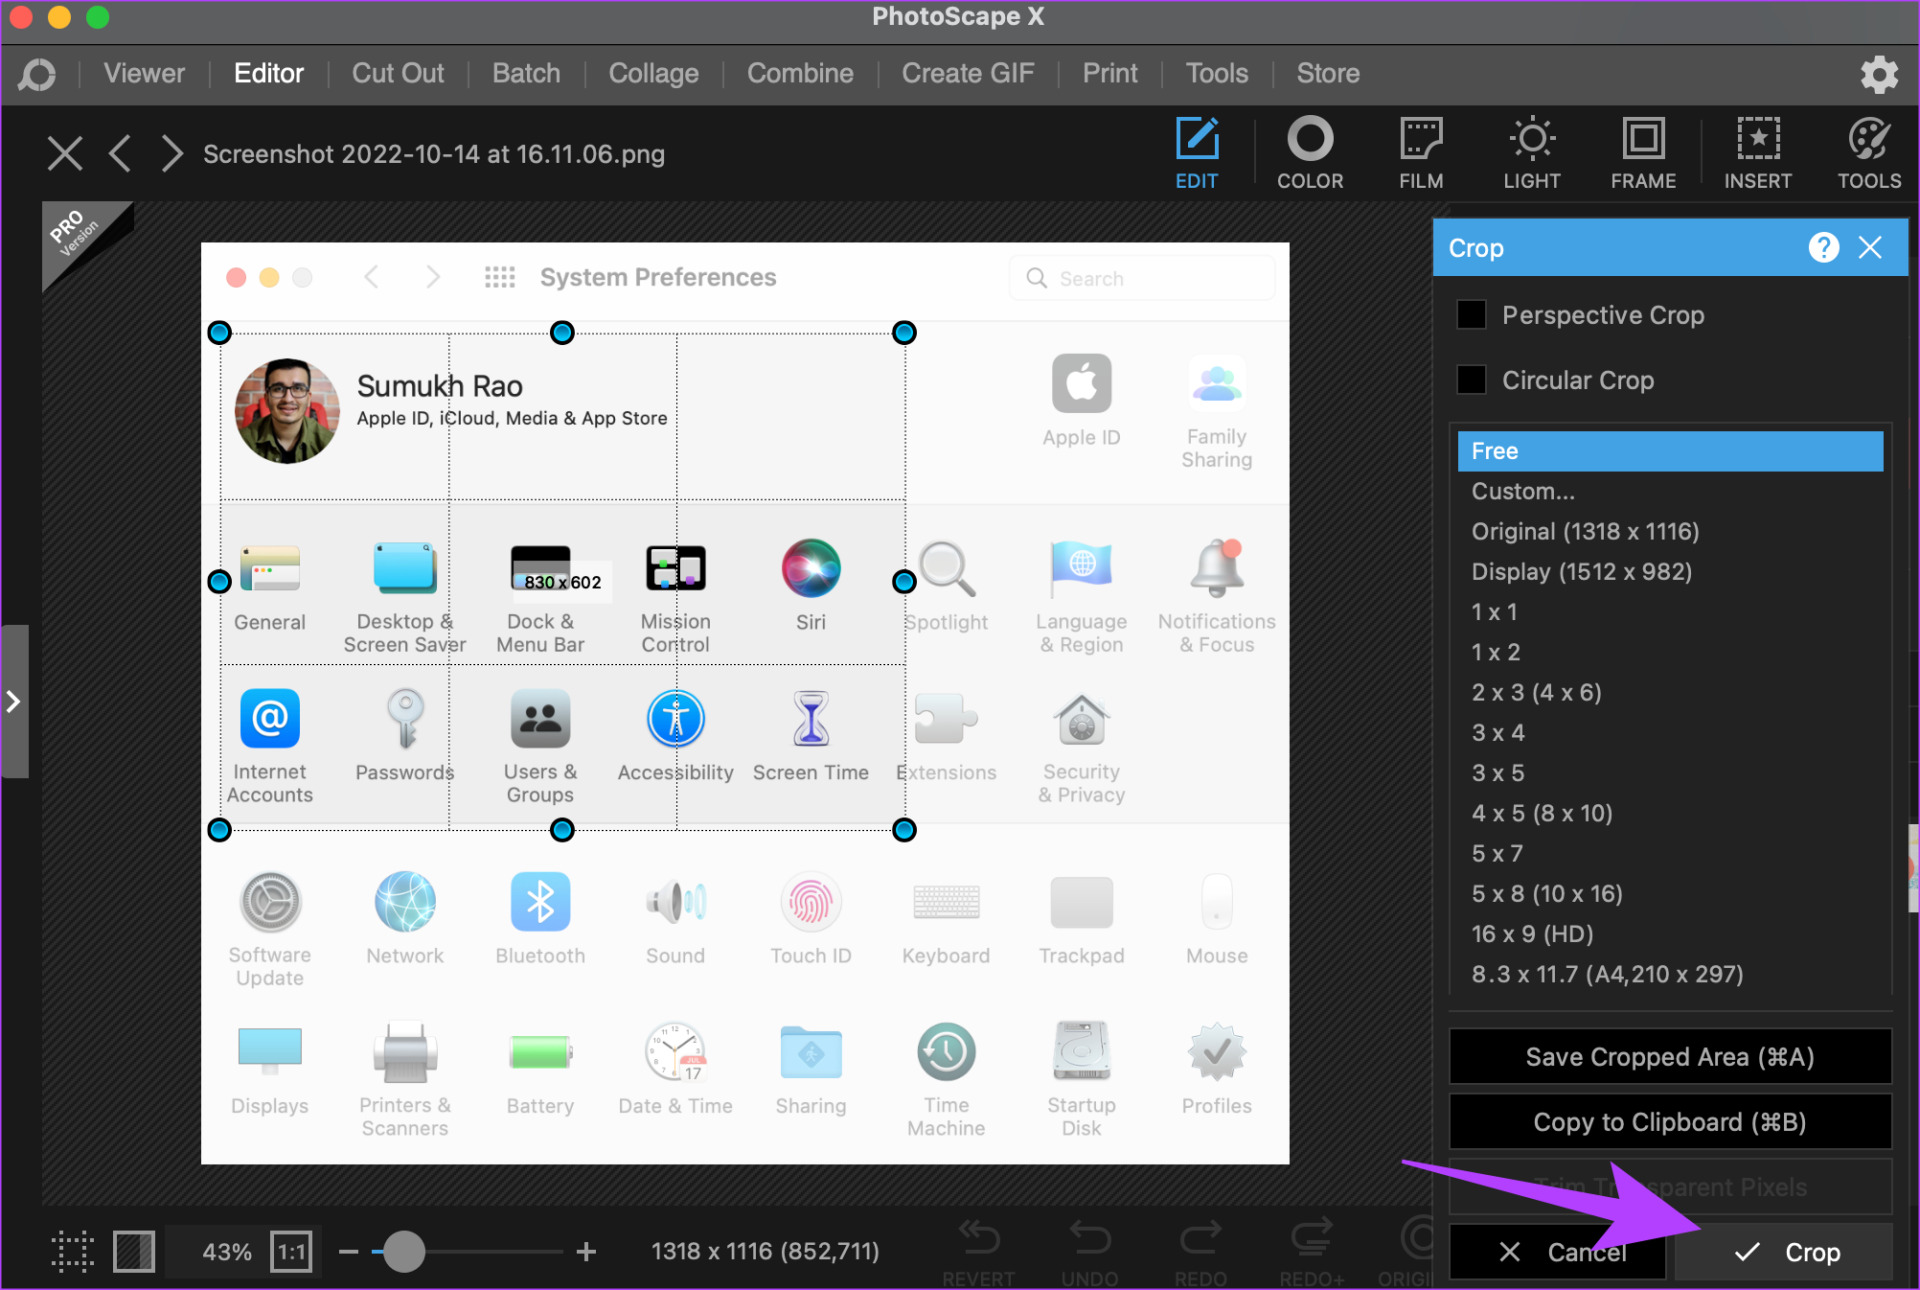
Your screenshot is now cropped. Press Command + S using your keyboard to save the edited screenshot.
5. Crop Screenshots on Mac Using Online Tools
Just like how there are plenty of third-party apps, there are several online tools and websites that can also help you crop your Mac’s screenshots. We recommend using iloveimg. This is how you can use the cropping tool to edit and crop your screenshots.
Step 1: Head over to the iloveimg website using the link below.
Step 2: Click on the large blue button that says Select images.

Step 3: Navigate to the screenshot you want to crop. Select it and then click on Open.
Step 4: Use your mouse to select the portion you want to crop. Then, choose the Crop Image option.
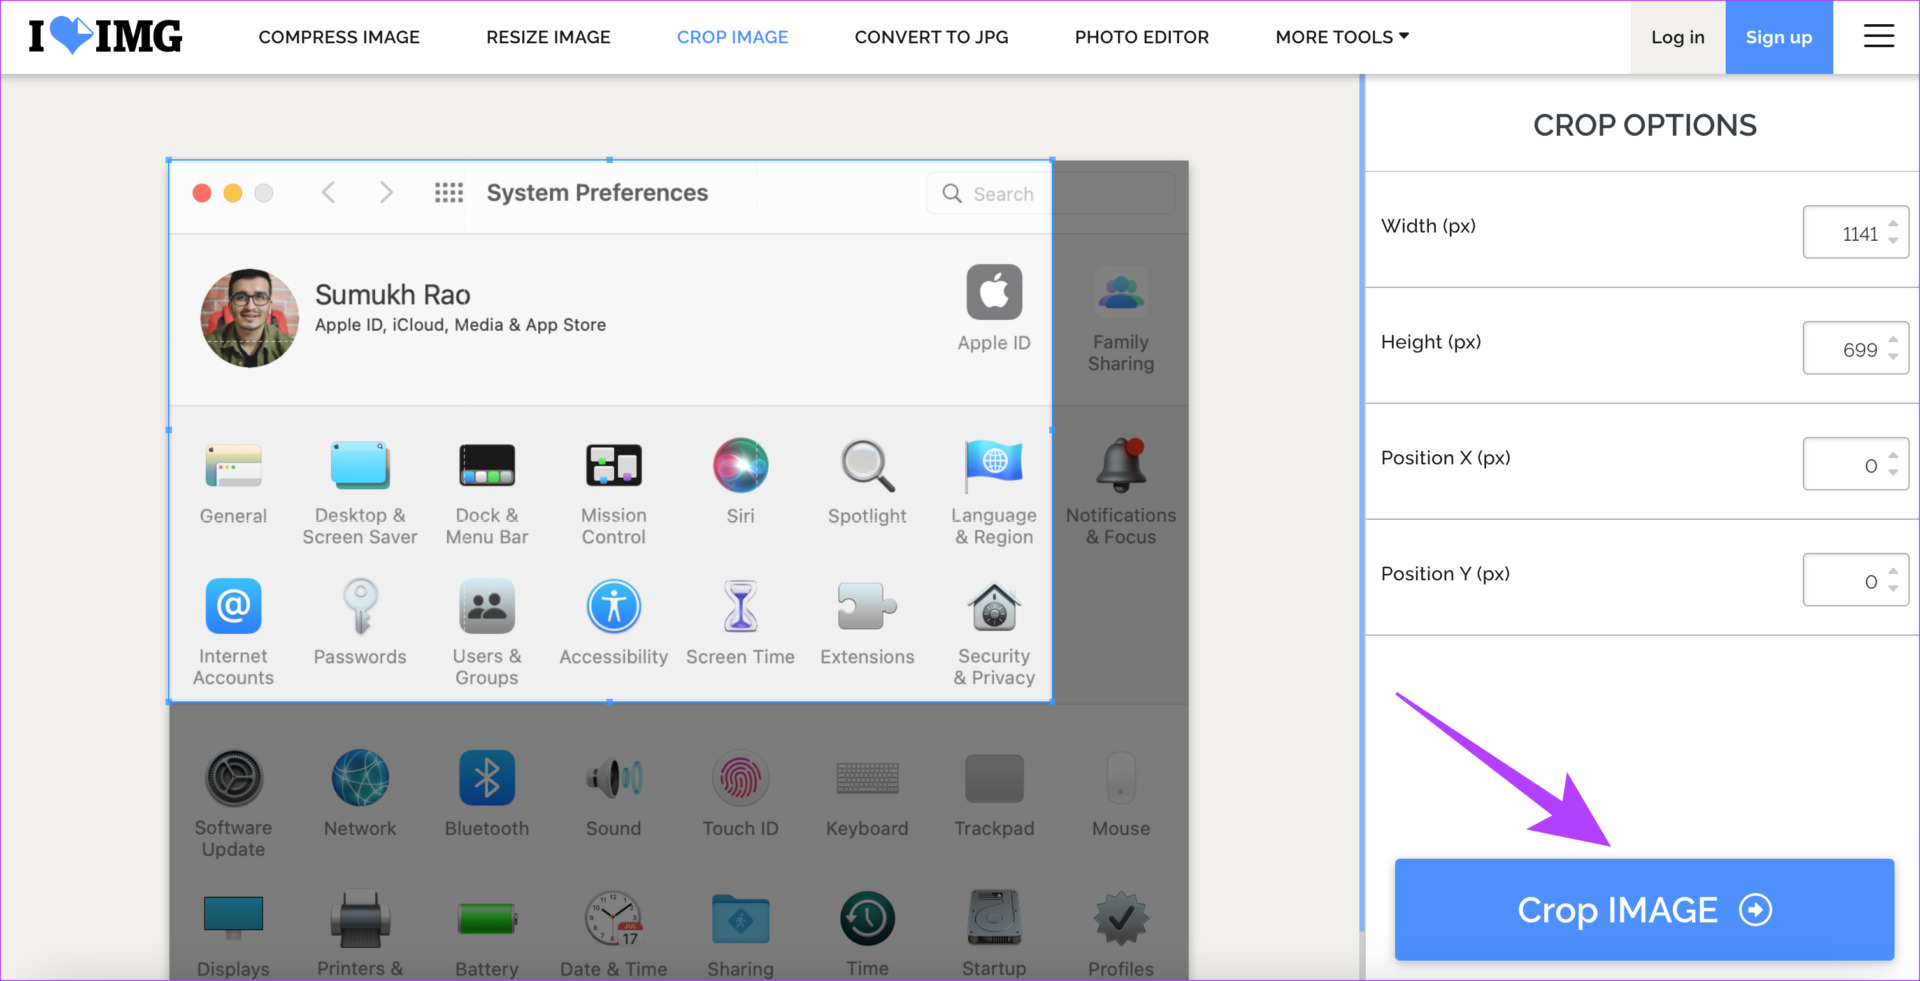
Step 5: Finally, click on Download cropped IMAGE.

Select the location where you want the screenshot to be stored and it will be downloaded there.
Save Important Portions of Screenshots
Apart from removing unimportant content from an image, cropping screenshots can also help you save precious storage space on your Mac. Once you learn how to crop a screenshot on Mac, you will be shedding a few extra MBs with every screenshot which will build up over time to give you a decent amount of free space for other files.
Was this helpful?
Last updated on 23 January, 2023
Read Next
 How to Use Dictionary in Any Kindle: A Comprehensive Guide
How to Download Dictionary on Kindle By default, an English dictionary will be downloaded onto your Kindle.
How to Use Dictionary in Any Kindle: A Comprehensive Guide
How to Download Dictionary on Kindle By default, an English dictionary will be downloaded onto your Kindle.
 What Is Spatial Sound in Windows 11: A Comprehensive Guide
The addition of streaming services like Netflix, Disney+, Prime Video, etc., has made good sound quality a necessity.
What Is Spatial Sound in Windows 11: A Comprehensive Guide
The addition of streaming services like Netflix, Disney+, Prime Video, etc., has made good sound quality a necessity.
 How to Compare Two Files in Notepad++: A Comprehensive Guide
Notepad++ is a versatile and feature-rich text editor catering to the needs of programmers, writers, and anyone who deals with text files.
How to Compare Two Files in Notepad++: A Comprehensive Guide
Notepad++ is a versatile and feature-rich text editor catering to the needs of programmers, writers, and anyone who deals with text files.
 How to Link Twitch to Discord: A Comprehensive Guide
Twitch and Discord are great places to hang out with friends and followers.
How to Link Twitch to Discord: A Comprehensive Guide
Twitch and Discord are great places to hang out with friends and followers.
 How to Crop an Image into Circle in GIMP
In any photo editing app, the crop tool is the most useful one to remove unnecessary portions from an image.
How to Crop an Image into Circle in GIMP
In any photo editing app, the crop tool is the most useful one to remove unnecessary portions from an image.
 How to Crop Pictures Into Shapes in Canva
Crop an Image Into a Shape on Canva Web Here's how to convert an image into a shape using Canva on your web browser.
How to Crop Pictures Into Shapes in Canva
Crop an Image Into a Shape on Canva Web Here's how to convert an image into a shape using Canva on your web browser.
 5 Best Websites to Crop Pictures into Shapes Online
What would a photo editor be without the crop feature?
5 Best Websites to Crop Pictures into Shapes Online
What would a photo editor be without the crop feature?
 4 Ways to Crop a Picture into a Circle in PowerPoint
Pictures enhance the overall look and impact of a presentation.
4 Ways to Crop a Picture into a Circle in PowerPoint
Pictures enhance the overall look and impact of a presentation.
The article above may contain affiliate links which help support Guiding Tech. The content remains unbiased and authentic and will never affect our editorial integrity.