Thanks to AirDrop, file sharing is seamless between Apple devices. However, the same isn’t true when you factor in a Windows 11 PC. You’ll need to use iTunes, cloud storage apps, or third-party solutions to transfer photos and videos from a Windows PC to an iPad. Here are the best ways to transfer files from PC to iPad.
Apple iPad is an ideal media consumption device. If you have high-resolution videos stored on a Windows PC, transfer them to your iPad and carry them everywhere.
1. Use iTunes to Transfer Files From a PC to an iPad
While Apple has retired iTunes on Mac, the company offers the same on Windows to manage your devices. Follow the steps below to use iTunes to move photos and videos from PC to an iPad.
Step 1: Download and install iTunes from the Microsoft Store on your Windows PC.
Step 2: We will use the VLC Player to complete the transfer process. Download VLC Player on your iPad.
Step 3: Open iTunes and grab a USB cable to connect your iPad to a Windows PC.
Step 4: Allow your computer to access information from your iPad.
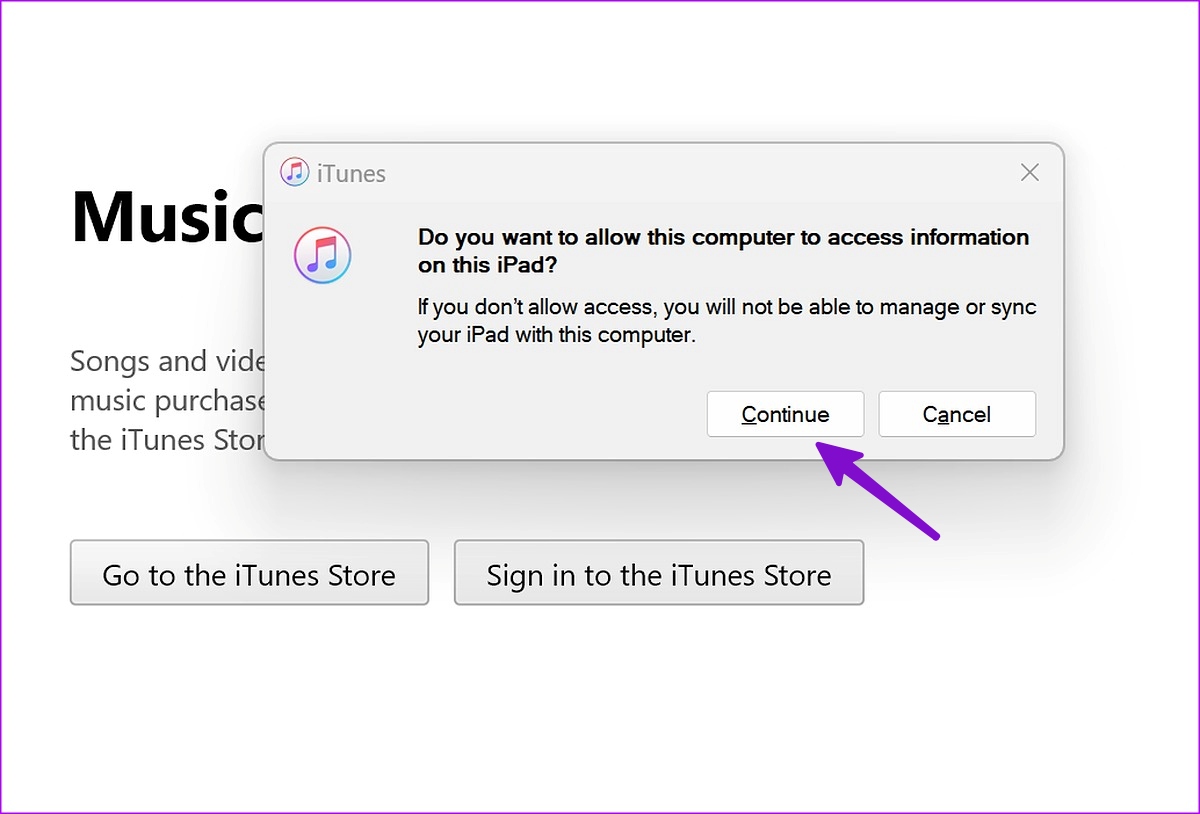
Step 5: Tap Trust on your iPad.

Step 6: Click iPad at the top and select File Sharing from the left sidebar.
Step 7: Select VLC. Click Add Files. It will open the File Explorer menu.
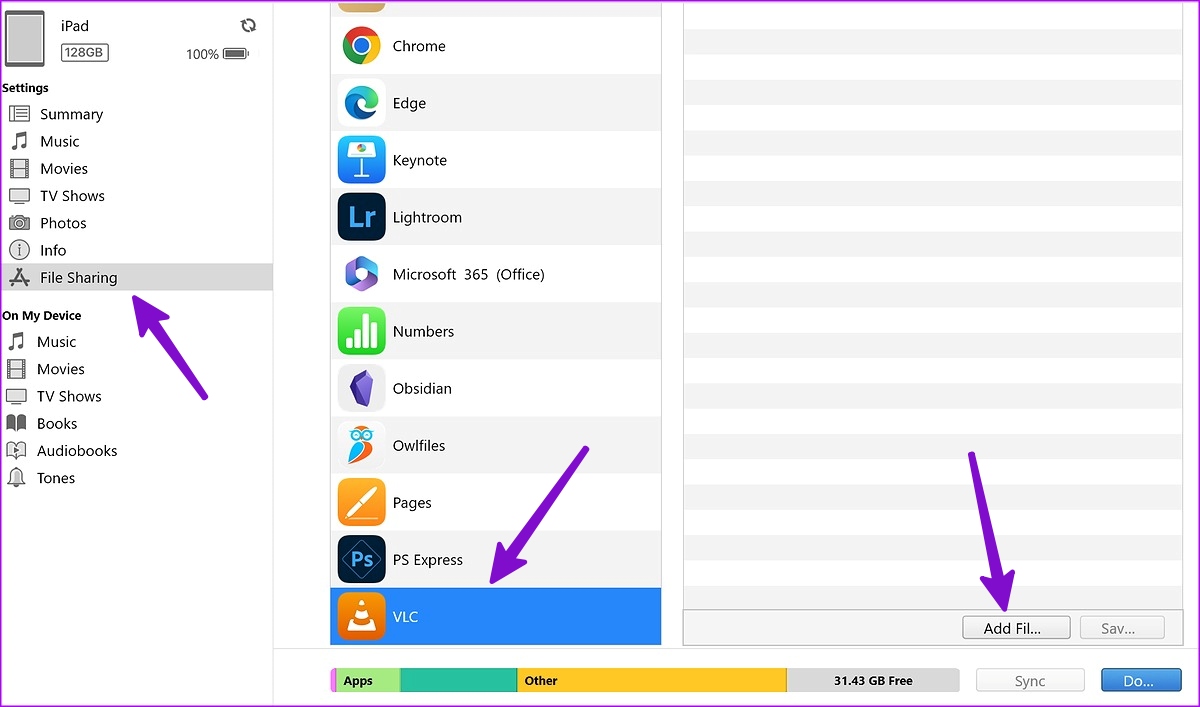
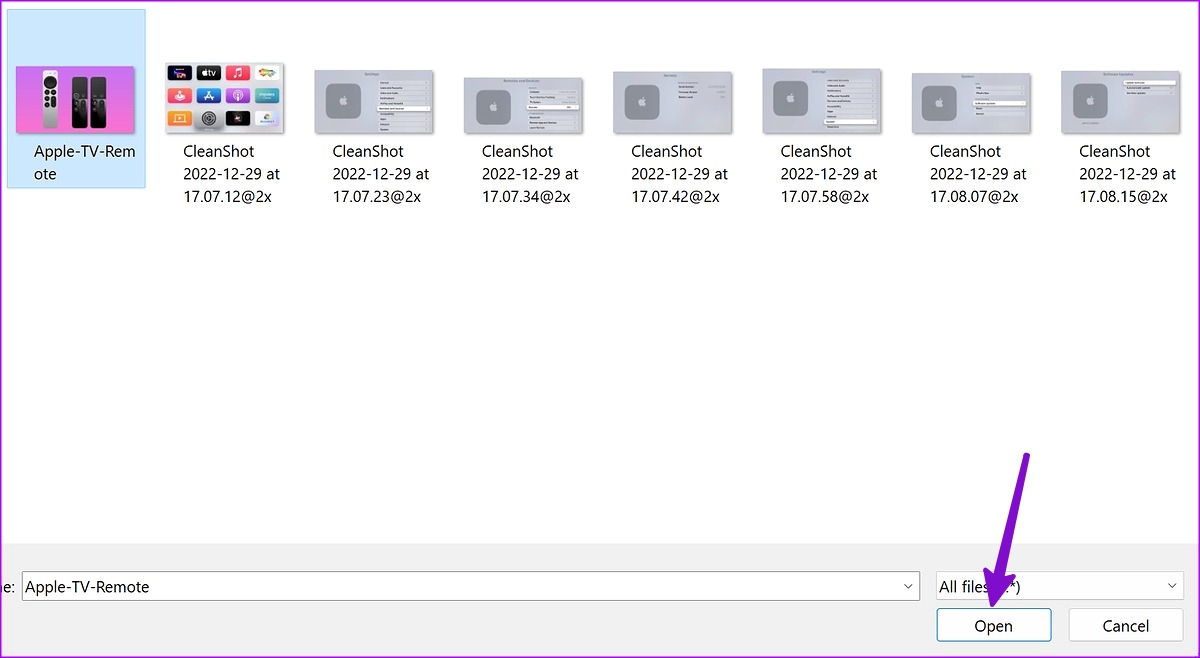
Step 8: Find videos you want to transfer from PC to VLC. Click Open.
Launch the VLC Player app on your iPad, and your videos will be ready to stream.

Similarly, if you want to transfer documents, use the Adobe Acrobat app on your iPad. After you transfer photos and videos from your PC to the VLC video player, use the steps below to access them.
Step 1: Open the Files app on iPad.
Step 2: Select ‘On My iPad’ from the left sidebar.
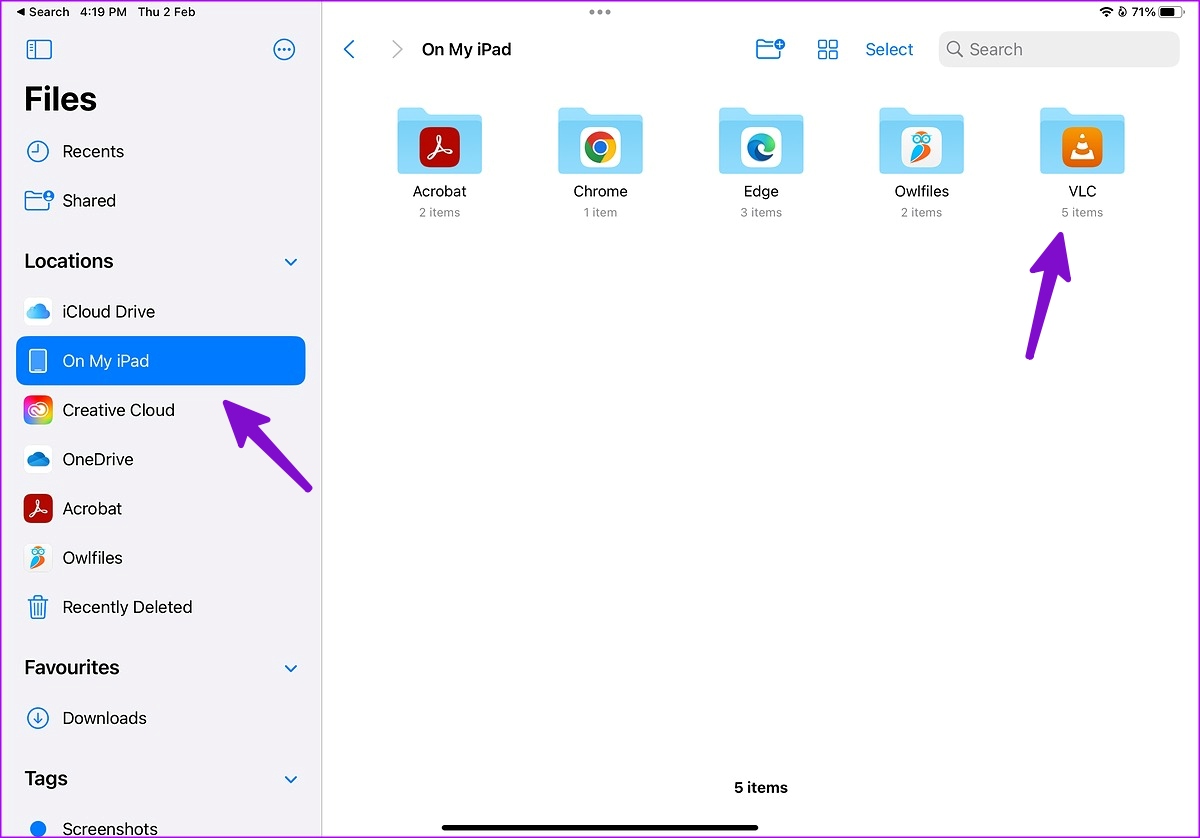
Step 3: Open the VLC folder and check all your transferred files.
2. Use iCloud to Move Photos From a PC to an iPad
This one is ideal for iCloud users. Apple offers a dedicated iCloud app on Windows to manage your iCloud photos, Safari bookmarks, iCloud passwords, calendars, and more. You can set up iCloud and transfer photos and videos from your PC to Apple’s cloud platform.
Step 1: Download iCloud from Microsoft Store.
Step 2: Open iCloud and sign in with your Apple account details.

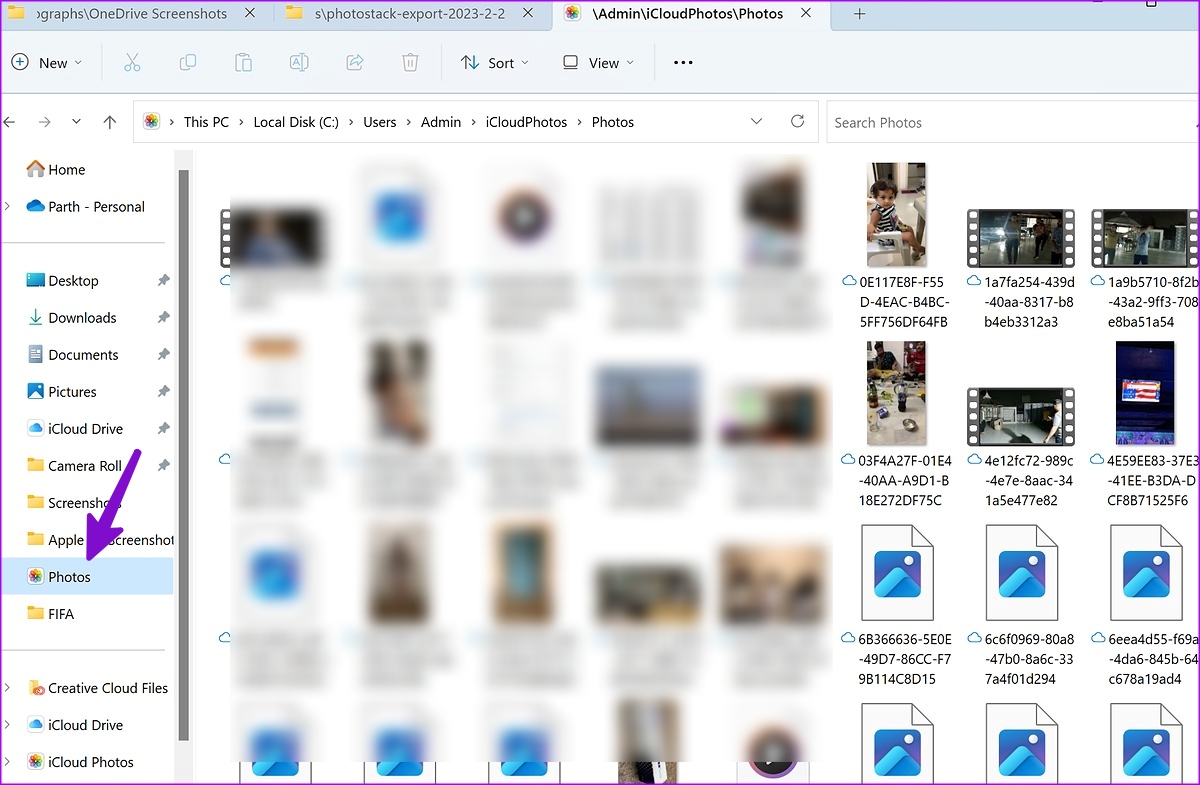
Step 3: Press Windows + E keys to launch Windows Explorer (previously File Explorer) and you will see iCloud Photos appearing from the sidebar.
Step 4: Copy photos and videos from your PC and paste them to iCloud Photos.
Step 5: iCloud will sync the media and make them available from the Photos app on your iPad.
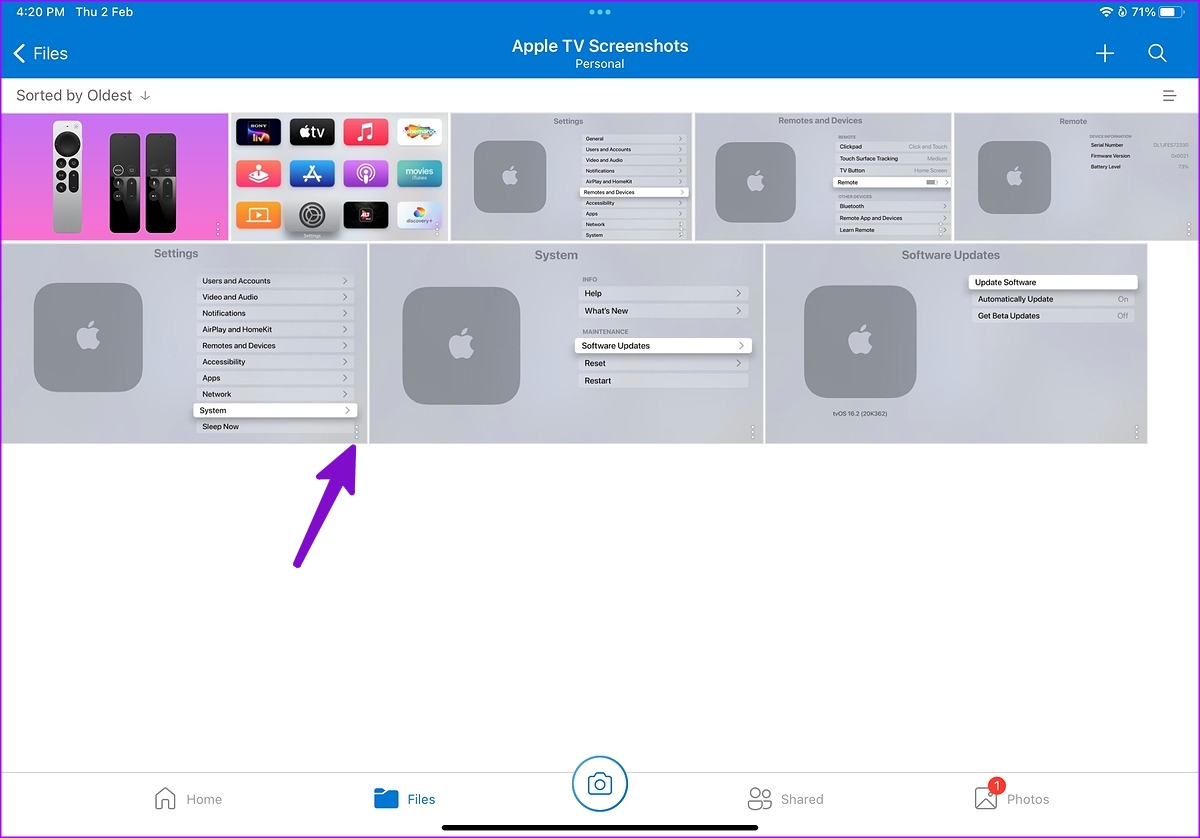
Launch the Photos app on your iPad and check your transferred photos and videos.
3. OneDrive to Transfer Files From a PC to an iPad
Microsoft offers 1TB OneDrive storage to all Microsoft 365 subscribers. Since OneDrive has a neat integration on Windows, transferring files from a PC to an iPad has never been easier. Here’s what you need to do.
Step 1: Download OneDrive on iPad.
Step 2: Open OneDrive and sign in with your Microsoft account details.
Step 3: Press Windows + E keys to launch Windows Explorer (previously File Explorer) on your Windows PC.
Step 4: Copy files from your PC to OneDrive folder that appears on the left sidebar in Windows Explorer.

Step 5: Check the syncing status from the Windows taskbar.
Step 6: Open OneDrive on your iPad and check all your uploaded files.
Step 7: Tap the three vertical dots menu beside a file and select Download from the context menu.
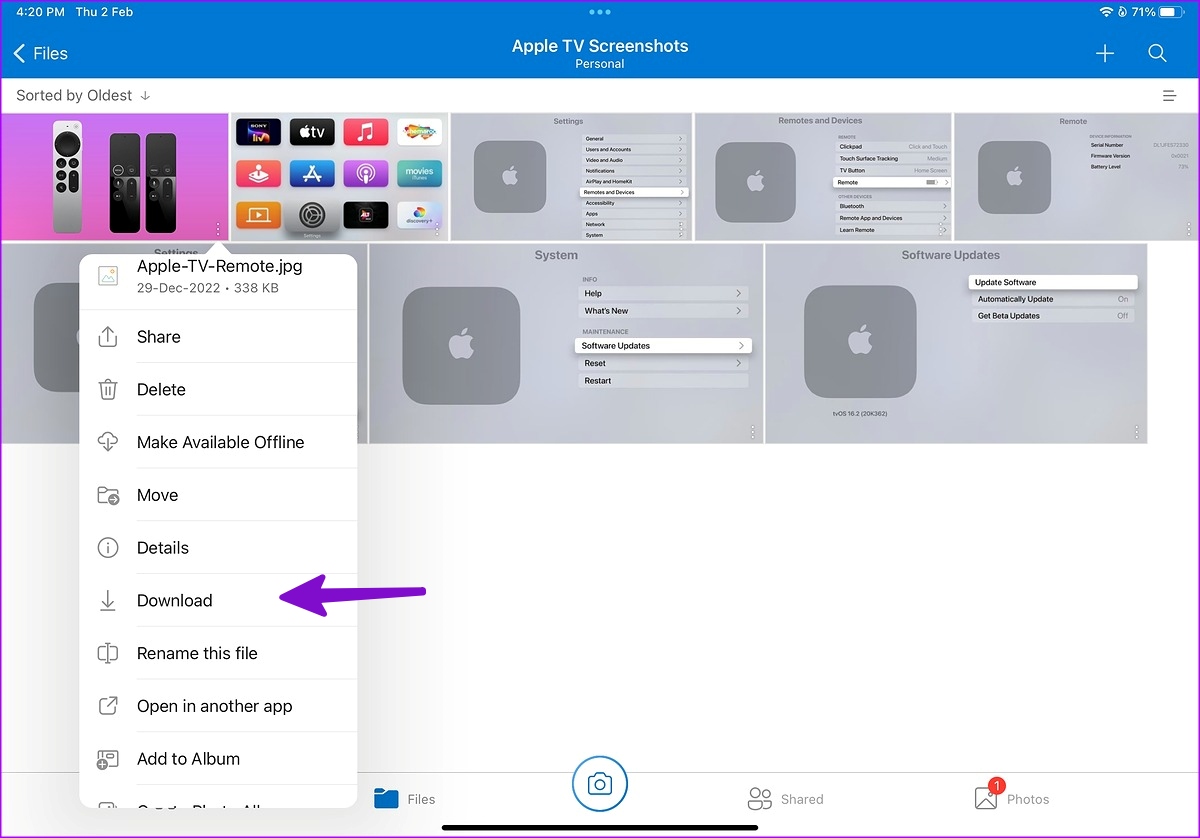
All your files are ready to use on your iPad.
4. Share Files From PC to iPad Over Wi-Fi
It’s one of the easiest ways to transfer files from a PC to an iPad. You can use VLC on your iPad and move files from PC to iPad wirelessly.
Step 1: Launch the VLC app on your iPad.
Step 2: Move to the Network tab.

Step 3: Enable the toggle next to ‘Sharing via Wi-Fi.’

Step 4: Open your preferred browser on Windows.
Step 5: Type the IP address. Make sure to keep your iPad and Windows PC on the same Wi-Fi network. It will open VLC’s ‘Sharing via Wi-Fi’ window.
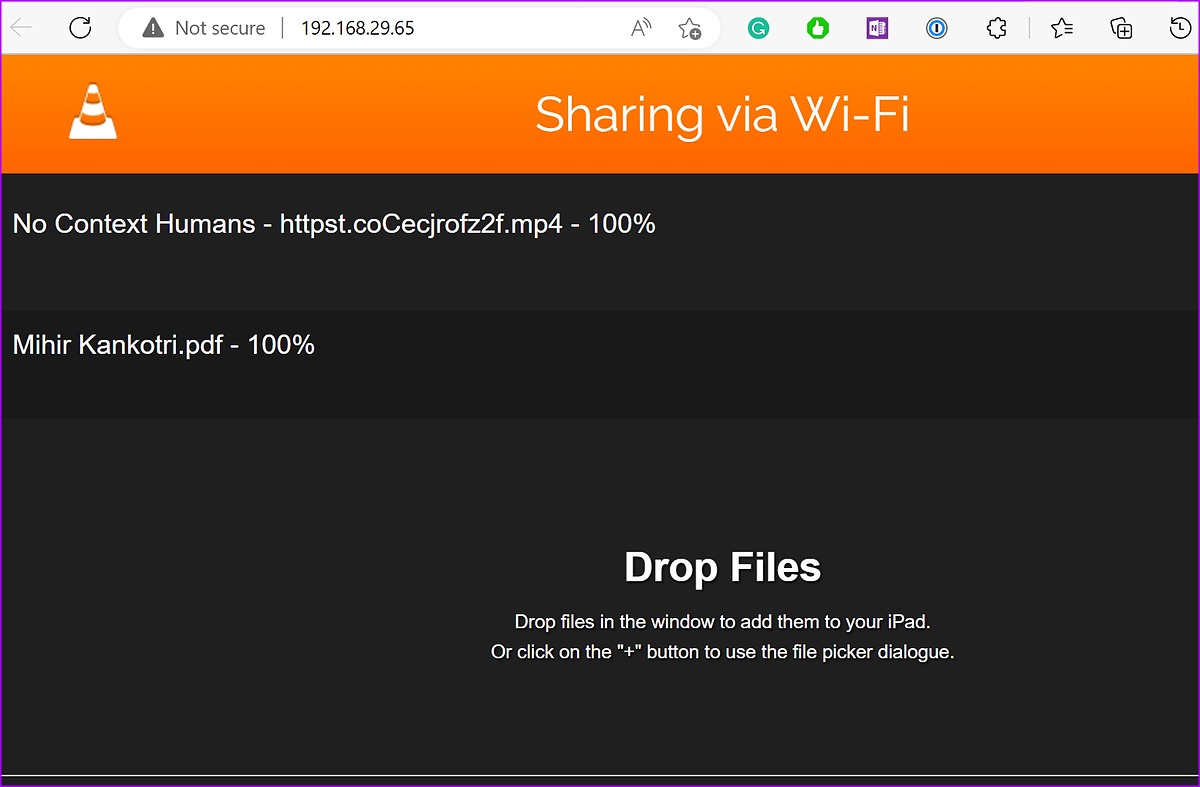
Step 6: Launch File Explorer on Windows. Drag and drop files from PC to VLC.
If you transfer videos from a PC to an iPad, they will show up instantly in the VLC app on your iPad. For photos and documents, you’ll need to access the VLC folder from the Files app on your iPad (as shown in the first trick above).
Access Your PC Files on iPad
While it’s not as convenient as using AirDrop, transferring files from a PC to an iPad won’t take more than a few minutes. As a Microsoft 365 subscriber, we prefer OneDrive to move files from PC to iPad. What about you? Share your preference in the comments below.
Was this helpful?
Last updated on 02 February, 2023
Read Next
 5 Best Ways to Transfer Files Between iPhone and Windows PC
We always speak about how convenient the Apple ecosystem is.
5 Best Ways to Transfer Files Between iPhone and Windows PC
We always speak about how convenient the Apple ecosystem is.
 5 Easiest Ways to Transfer Files From iPhone to Mac
AirDrop is the most popular way to transfer files from an iPhone to a Mac.
5 Easiest Ways to Transfer Files From iPhone to Mac
AirDrop is the most popular way to transfer files from an iPhone to a Mac.
 4 Ways to Transfer Files Between Mac and Android Wirelessly
If you own a Mac and an Android, you must be looking for a way to transfer files from Android to Mac and vice versa because searching for a data
4 Ways to Transfer Files Between Mac and Android Wirelessly
If you own a Mac and an Android, you must be looking for a way to transfer files from Android to Mac and vice versa because searching for a data
 Top 3 Ways to Delete Old Windows Update Files From Windows 10 and Windows 11
Windows updates bring new features, security improvements, and bug fixes for your PC.
Top 3 Ways to Delete Old Windows Update Files From Windows 10 and Windows 11
Windows updates bring new features, security improvements, and bug fixes for your PC.
 How to Use Xiaomi ShareMe App to Transfer Files and Data on Android
How do you transfer files between two phones?
How to Use Xiaomi ShareMe App to Transfer Files and Data on Android
How do you transfer files between two phones?
 How to Use Nearby Share on Mac to Transfer Files From Android
Google's Nearby Share is an awesome alternative to AirDrop to transfer files between two Android devices.
How to Use Nearby Share on Mac to Transfer Files From Android
Google's Nearby Share is an awesome alternative to AirDrop to transfer files between two Android devices.
The article above may contain affiliate links which help support Guiding Tech. The content remains unbiased and authentic and will never affect our editorial integrity.